Kia Sportage: Audio / Speakers Repair procedures
Kia Sportage QL (2015-2026) Service Manual / Body Electrical System / Audio / Speakers Repair procedures
| Inspection |
| Troubleshooting of the speakers |
When handling the speakers :
|

| 1. |
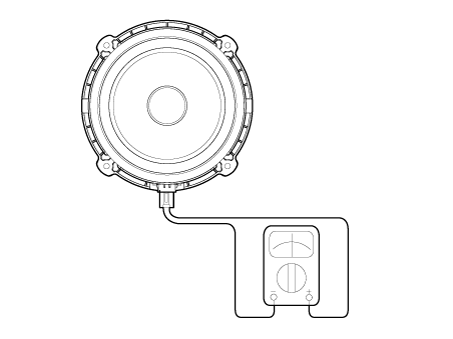
Basic inspection
Loosen the screws to rule out the interference from the body trims and
surrounding parts and then remove the speaker.
After removing the speaker, check the sound quality of the speaker with
the connector plugged in.
|
| 2. |
Inspection for each cause
|

| Removal |
Front Door Speaker
| 1. |
Disconnect the negative (-) battery terminal.
|
| 2. |
Remove the front door trim.
(Refer to Body - "Front Door Trim")
|
| 3. |
Remove the front door speaker (B) after disconnecting the connector
(A) and loosening the screws.
|

Front Door Tweeter Speaker
| 1. |
Disconnect the negative (-) battery terminal.
|
| 2. |
Remove the front door trim.
(Refer to Body - "Front Door Trim")
|
| 3. |
Remove the tweeter speaker (A) after loosening the screws.
|
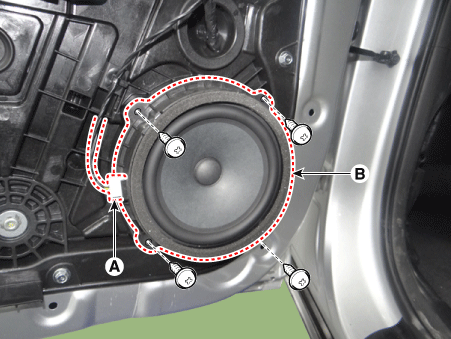
Rear Door Speaker
| 1. |
Disconnect the negative (-) battery terminal.
|
| 2. |
Remove the Rear door trim.
(Refer to Body - "Rear Door Trim")
|
| 3. |
Remove the rear door speaker (B) after disconnecting the connector (A)
and loosening the screws.
|
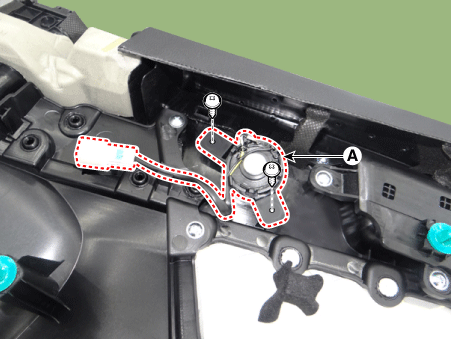
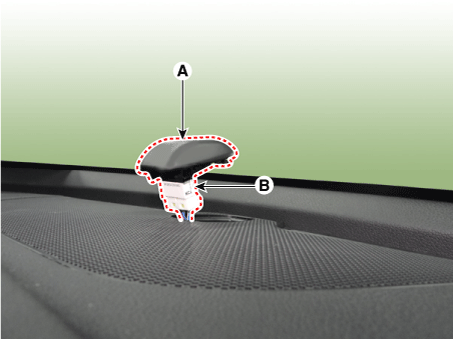
Crash Pad Center Speaker
| 1. |
Disconnect the negative (-) battery terminal.
|
| 2. |
With a flat-head screwdriver, remove the photo sensor (A) from the center
of the defrost nozzle after disconnecting the connector (B).
|
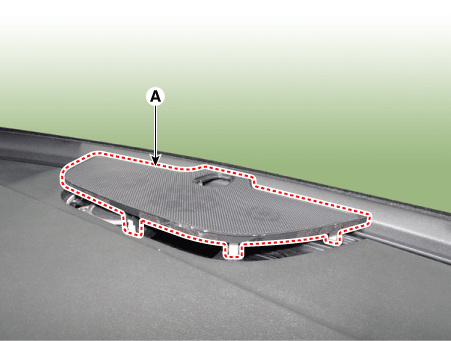
| 3. |
Using a scraper or remover, remove the crash pad center speaker grill
(A).
|
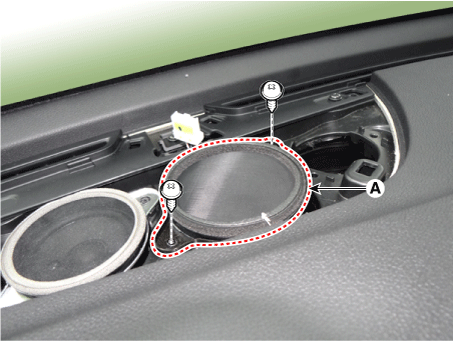
| 4. |
Remove the crash pad center speaker (A) after loosening the screws.
|
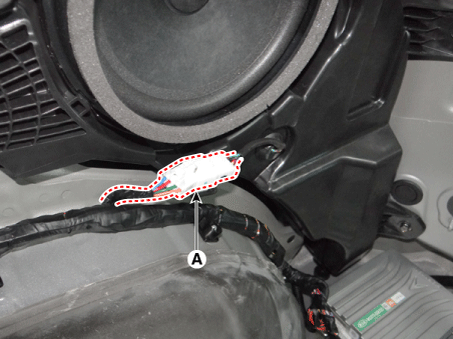
| 5. |
Disconnect the crash pad center speaker connector (A).
|

Sub Woofer Speaker
| 1. |
Disconnect the negative (-) battery terminal.
|
| 2. |
Remove the right luggage side trim.
(Refer to Body - "Luggage Side Trim")
|
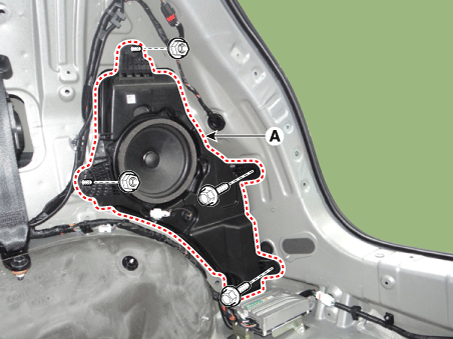
| 3. |
Disconnect the sub woofer speaker connector (A).
|
| 4. |
Remove the sub woofer speaker (A) after loosening the bolts and nuts.
|
| Installation |
Front Door Speaker
| 1. |
Install the front door speaker.
|
| 2. |
Install the front door trim.
|
| 3. |
Connect the negative (-) battery terminal.
|
Front Door Tweeter Speaker
| 1. |
Install the front door tweeter speaker.
|
| 2. |
Install the front door trim.
|
| 3. |
Connect the negative (-) battery terminal.
|
Rear Door Speaker
| 1. |
Install the rear door speaker.
|
| 2. |
Install the rear door trim.
|
| 3. |
Connect the negative (-) battery terminal.
|
Crash Pad Center Speaker
| 1. |
Install the crash pad center speaker.
|
| 2. |
Install the crash pad center speaker grill.
|
| 3. |
Install the photo sensor.
|
| 4. |
Connect the negative (-) battery terminal.
|
Sub Woofer Speaker
| 1. |
Install the sub woofer speaker.
|
| 2. |
Install the right luggage side trim.
|
| 3. |
Connect the negative (-) battery terminal.
|
|
 Audio Unit Repair procedures
Removal
•
When removing with a flat-tip screwdriver or remover, wrap protective
...
 External Amp Components and components location
Components
Connector Pin Information
No.
Connector A
No.
Connector B
1
Battery (+)
1 ...
Other information:
Kia Sportage QL (2015-2026) Service Manual: Manifold Absolute Pressure Sensor (MAPS) Repair procedures
Inspection 1. Connect the KDS/GDS on the Data Link Connector (DLC). 2. Measure the output voltage of the MAPS at idle and IG ON. Pressure [kPa (kgf/cm², psi)] Output Voltage (V) [Vr ...
Kia Sportage QL (2015-2026) Service Manual: Release residual pressure in fuel line
Release Residual Pressure in Fuel Line Whenever the high pressure fuel fuse, fuel pipe, delivery pipe, or injector is removed immediately after shutting off the engine, an injury may be caused by th ...
Copyright © www.ksportagegl.com 2015-2026
