Kia Sportage: Power Door Mirrors / Power Door Mirror Switch Repair procedures
Kia Sportage QL (2015-2026) Service Manual / Body Electrical System / Power Door Mirrors / Power Door Mirror Switch Repair procedures
| Inspection |
| 1. |
Disconnect the negative (-) battery terminal.
|
| 2. |
Remove the front left door trim.
(Refer to Body - "Front Door Trim")
|
| 3. |
Disconnect the power mirror switch connector from the door trim.
|
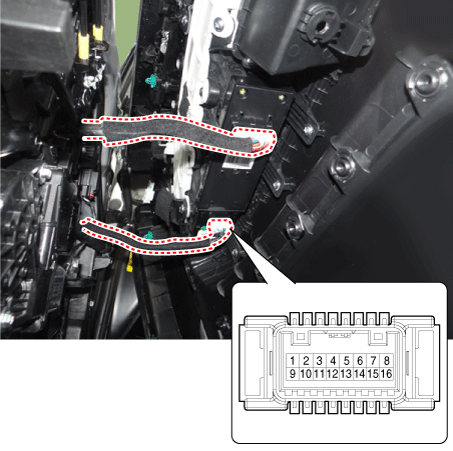
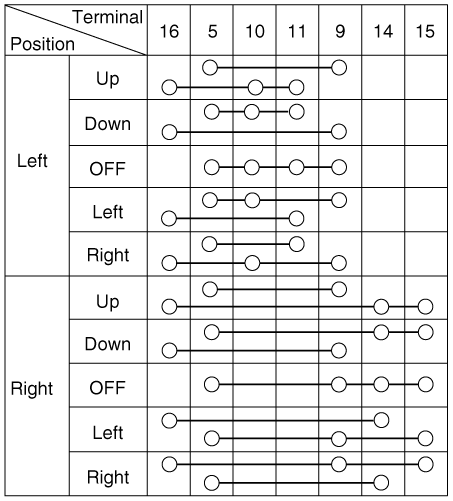
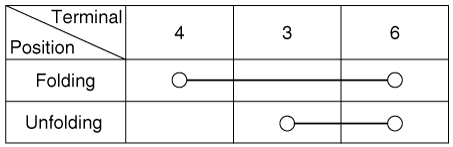
| 4. |
Check for continuity between the terminals in each switch position as
shown below.
[Power Mirror Switch]
[Power Folding Mirror Switch]
|
| Removal |
|

| 1. |
Disconnect the negative (-) battery terminal.
|
| 2. |
Remove the front door trim.
(Refer to Body - "Front Door Trim")
|
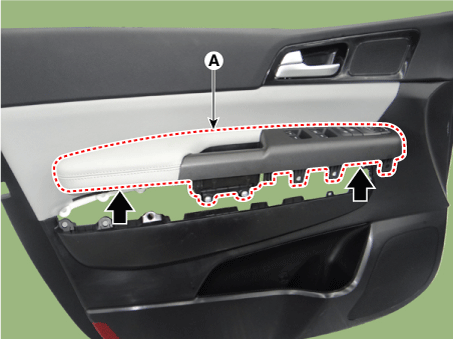
| 3. |
Loosen the front door trim armrest assembly mounting screws.
|
| 4. |
Remove the front door trim armrest assembly (A).
|
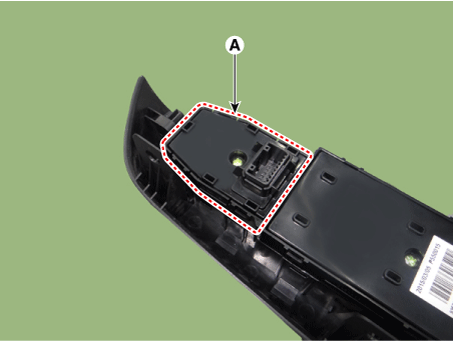
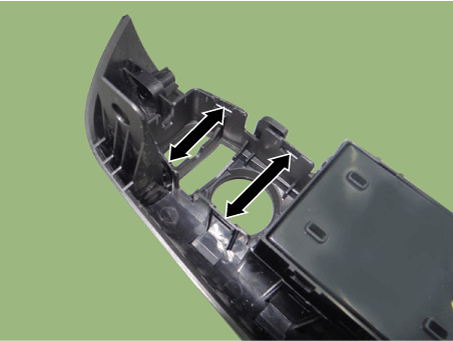
| 5. |
Remove the power mirror switch assembly (A) after disengaging the mounting
clips.
|

| Installation |
| 1. |
Install the power mirror switch assembly.
|
| 2. |
Install the front door trim armrest assembly.
|
| 3. |
Install the front door trim.
|
| 4. |
Connect the negative (-) battery terminal.
|
 Power Door Mirror Switch Schematic diagrams
Circuit Diagram
...
 Power Door Mirror Actuator Components and components location
Components
1. BSD Indicator
2. Side repeater lamp
...
Other information:
Kia Sportage QL (2015-2026) Owners Manual: 3. Exhaust emission control system
The Exhaust Emission Control System is a highly effective system which controls exhaust emissions while maintaining good vehicle performance. Vehicle modifications This vehicle should not be modified. Modification of your vehicle could affect its performance, safety or durability and may even ...
Kia Sportage QL (2015-2026) Service Manual: Front Washer Motor Repair procedures
Inspection Front Washer Motor 1. With the washer motor connected to the reservoir tank, fill the reservoir tank with water. • ...
Copyright © www.ksportagegl.com 2015-2026
