Kia Sportage: Front Suspension System / Front Lower Arm Repair procedures
| 1. |
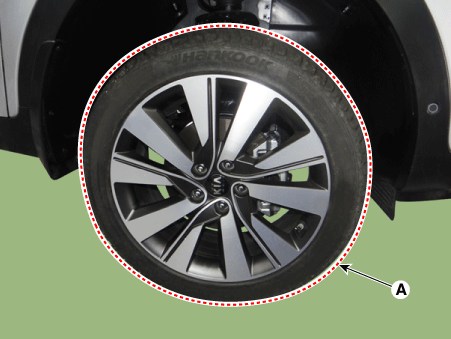
Remove wheel nuts, wheel and tire (A) from hub.
|
Tightening torque:
107.9 - 127.5 N·m (11.0 - 13.0 kgf·m, 79.6 - 94.0 lb·ft)
|
|
Be careful not to damage the hub bolts when removing the wheel
& tire.
|
|
| 2. |
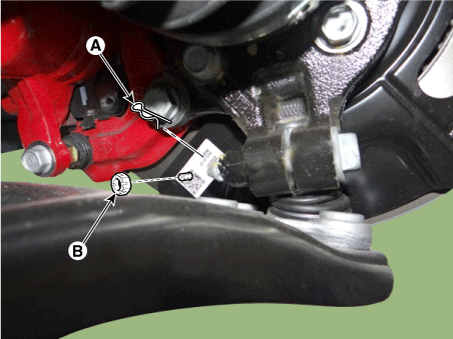
Loosen the pin (A), and then remove the lower arm nut (B).
|
Tightening torque:
98.0 - 117.6 N·m (10.0 - 12.0 kgf·m, 72.3 - 86.7 lb·ft)
|
|
| 3. |
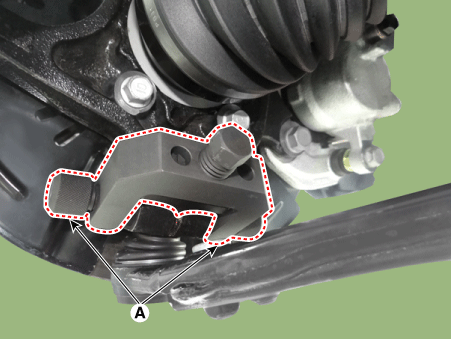
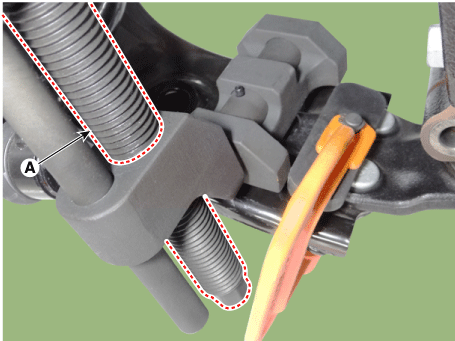
Remove the front lower arm from the front knuckle using the SST (0K545-A9100).
| (1) |
After removing bolts from the front knuckle, install and tighten
the sub body bolt (A).
|
| (2) |
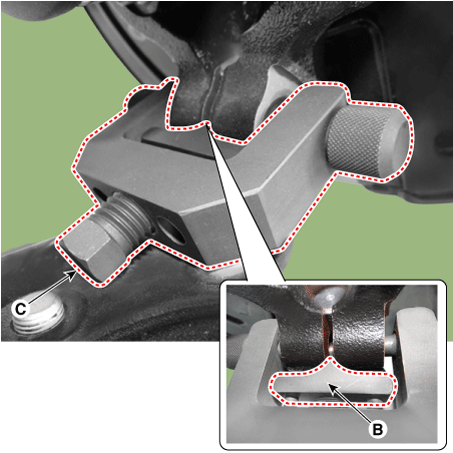
Insert the sub body (B) between the front knuckle and the sub
body bolt.
|
| (3) |
Tighten the bolt (C) sub body to broaden the gap of the front
knuckle.
|
| (4) |
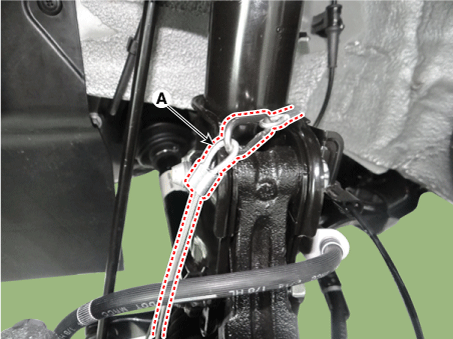
Install the safe wire (A).
|
| (5) |
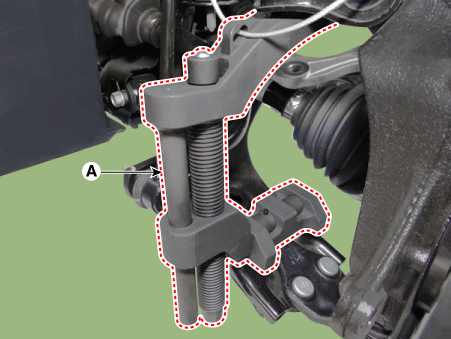
Install the main body (A) between the front strut and the lower
arm.
|
| (6) |
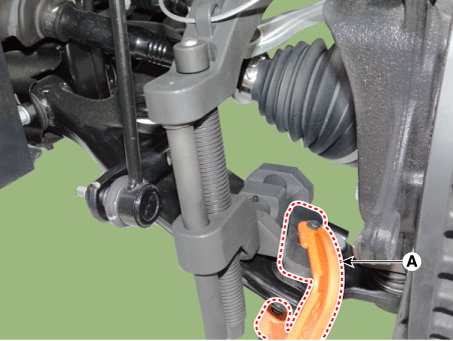
To avoid the main body coming off, install a fixing clamp (A)
beside the main body.
|
| (7) |
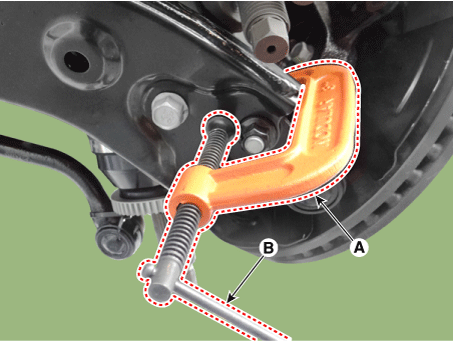
After installing the body (A) rotate the handle (B) clockwise
until the clamp is fixed on the lower arm.
|
| (8) |
Tighten the main body bolt (A) slowly and remove the lower arm
from the front knuckle.
|
|
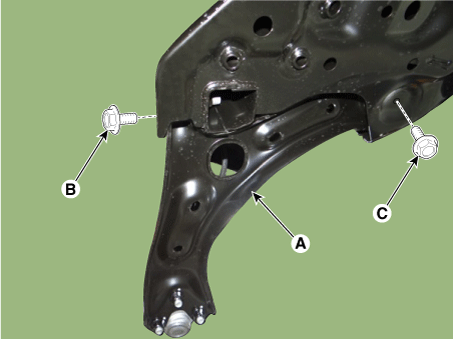
| 4. |
Remove the lower arm (A) from the sub frame.
|
Tightening torque:
B : 117.7 - 137.3 N·m (12.0 - 14.0 kgf·m, 86.8 - 101.3 lb·ft)
C : 156.9 - 176.5 N·m (16.0 - 18.0 kgf·m, 115.7 - 130.2 lb·ft)
|
|
| 5. |
Install in the reverse order of removal.
|
| 6. |
Check the wheel alignment.
(Refer to Tires/Wheels - Alignment")
|
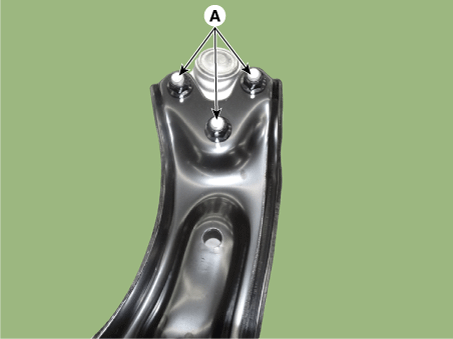
| 1. |
Disconnect the ball joint after loosening the nut (A).
|
Tightening torque :
117.7 - 137.3 N·m (12.0 - 14.0 kgf·m, 86.6 - 101.3 lb·ft)
|
| •
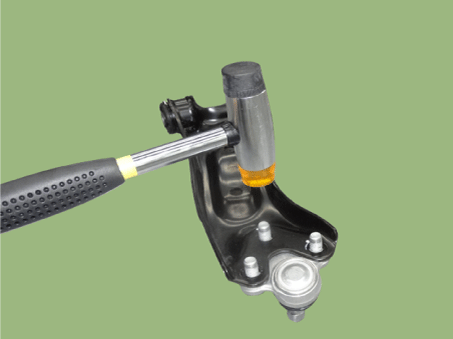
|
Using a plastic hammer, remove the ball joint.
|
| •
|
Do not to damage the lower arm.
|
|
|
| 2. |
Install a new ball joint and then tighten the nut (A).
|
Tightening torque :
117.7 - 137.3 N·m (12.0 - 14.0 kgf·m, 86.6 - 101.3 lb·ft)
|

|
| 1. |
Check the bushing for wear and deterioration.
|
| 2. |
Check the lower arm for bending or breakage.
|
| 3. |
Check the lower arm for deformation.
|
| 4. |
Check all bolts and nuts.
|
| 5. |
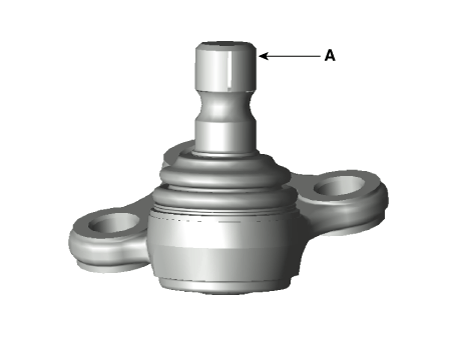
Check the ball joint rotating torque.
|
Standard value : 9.8 - 29.4 N·m (1.0 - 3.0 kgf·m, 7.2 - 21.7
lb-ft)
|
| (1) |
Move the ball stud (A) 5 times to the front and back, and rotate
5 times to evenly apply the grease. Fix the ball stud stationary
for 24 hours at the center, then roll 3 times to the front and
back, and rotate 3 times before measuring the torque.
|
| (2) |
Read the constant torque value within 180° when it is rotated
at speed of approximately 12°/s.
|
Standard value : 9.8 - 29.4 N·m (1.0 - 3.0 kgf·m, 7.2
- 21.7 lb-ft)
|
|
|
Components
1. Ball joint assembly
2. Front lower arm assembly
...
Removal
1.
Remove wheel nuts, wheel and tire (A) from hub.
Tightening torque:
107.9 - 127.5 N·m (11.0 - 13.0 kgf·m, 79.6 - 9 ...
Other information:
Specification
Item
Resistance (Ω)
Driver Airbag (DAB)
1.7 - 2.3
Passenger Airbag (PAB)
1.7 - 2.3
Side Airbag (SAB)
1.8 - 2.4
Curtain Airbag (CAB)
...
The brightness of the instrument panel illumination is changed by pressing the
illumination control button (“+” or “-”) when the ignition switch or Engine Start/Stop
button is ON, or the taillights are turned on.
If you hold the illumination control button (“+” or “-”), t ...
 Front Lower Arm Components and components location
 Front Stabilizer Bar Repair procedures


