Kia Sportage: Front Suspension System / Front Stabilizer Bar Repair procedures
| 1. |
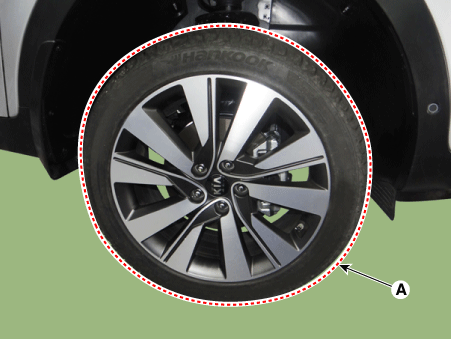
Remove wheel nuts, wheel and tire (A) from hub.
|
Tightening torque:
107.9 - 127.5 N·m (11.0 - 13.0 kgf·m, 79.6 - 94.0 lb·ft)
|
|
Be careful not to damage the hub bolts when removing the wheel
& tire.
|
|
| 2. |
Remove the universal bolt (A).
|
Tightening torque:
32.4 - 37.3 N.m (3.3 - 3.8 kgf.m, 23.9 - 27.5 lb-ft)
|
| •
|
Keep the neutral-range to prevent damaging the clock
spring inner cable when handling the steering wheel.
|
|
|
| 3. |
Remove the under cover.
(Refer to Engine Mechanical System - "Engine Room Under Cover")
|
| 4. |
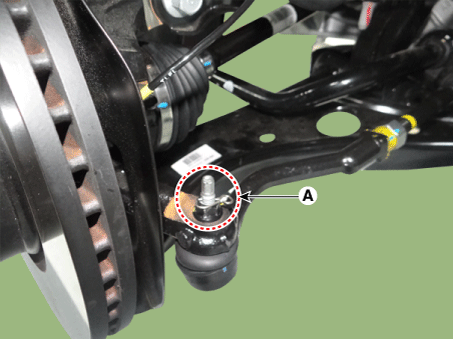
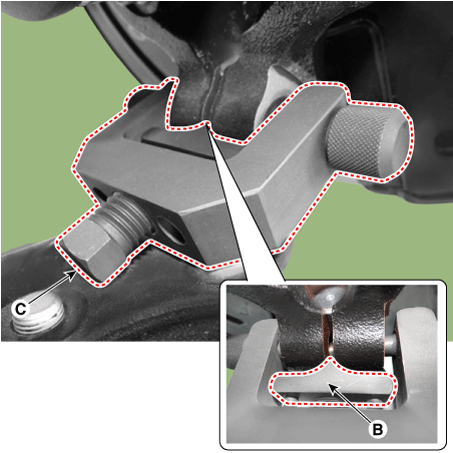
Remove the nut and pin (A).
|
Tightening torque:
34.3 - 44.1 N·m (3.5 - 4.5 kgf·m, 25.3 - 32.5 lb·ft)
|
|
| 5. |
Remove the tie rod end ball joint from the knuckle by using the SST
(09568-34000).

| •
|
When using SST, be careful not to damage the dust cover
of lower arm ball joint.
|
| •
|
Keep SST tied to the car as there is risk of injury
when the SST is dropped while removing the lower arm
ball joint.
|
| •
|
Be sure to use SST when removing the lower arm ball
joint as general tool such as lever may damage the peripheral
parts.
|
|
|
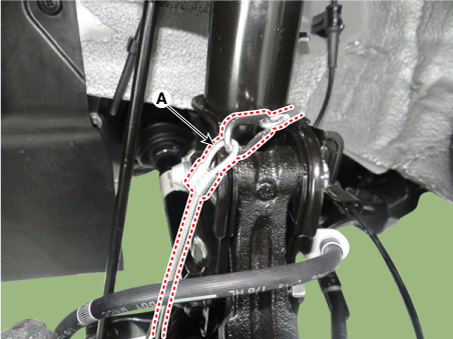
| 6. |
Loosen the pin (A), and then remove the lower arm nut (B).
|
Tightening torque:
98.0 - 117.6 N·m (10.0 - 12.0 kgf·m, 72.3 - 86.7 lb·ft)
|
|
| 7. |
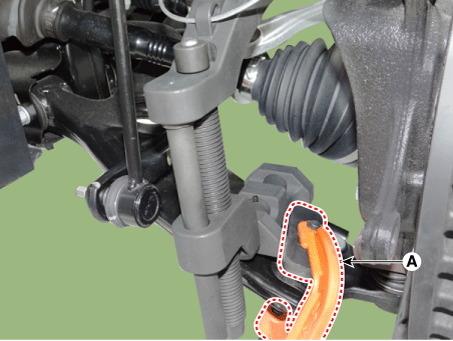
Remove the front lower arm from the front knuckle using the SST (0K545-A9100).
| (1) |
After removing bolts from the front knuckle, install and tighten
the sub body bolt (A).

|
| (2) |
Insert the sub body (B) between the front knuckle and the sub
body bolt.
|
| (3) |
Tighten the bolt (C) sub body to broaden the gap of the front
knuckle.
|
| (4) |
Install the safe wire (A).
|
| (5) |
Install the main body (A) between the front strut and the lower
arm.
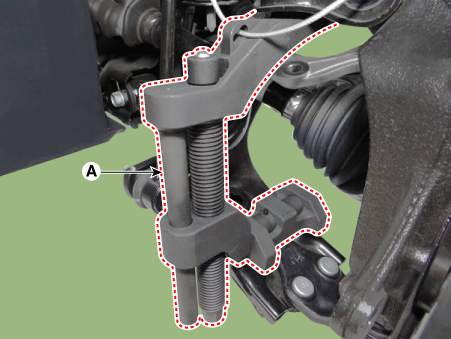
|
| (6) |
To avoid the main body coming off, install a fixing clamp (A)
beside the main body.
|
| (7) |
After installing the body (A), rotate the handle (B) clockwise
until the clamp is fixed on a lower arm.
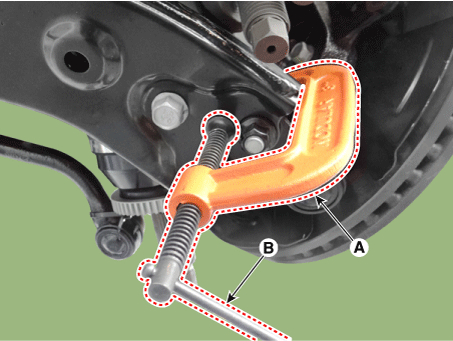
|
| (8) |
Tighten the main body bolt (A) slowly and remove the lower arm
from the front knuckle.
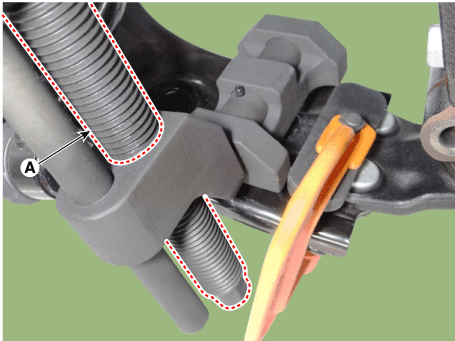
|
|
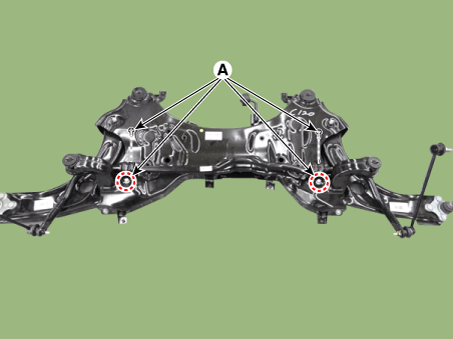
| 8. |
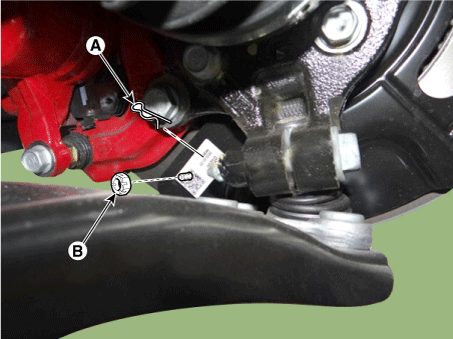
Remove the stabilizer link nut (A).
|
Tightening torque:
98.0 - 117.6 N·m (10.0 - 12.0 kgf·m, 72.3 - 86.7 lb·ft)
|

|
| 9. |
Remove the muffler hanger.
|
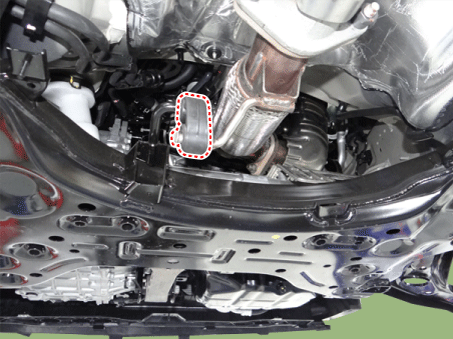
| 10. |
Remove the roll rod bracket.
(Refer to Engine Mechanical System -"Engine Mounting")
|
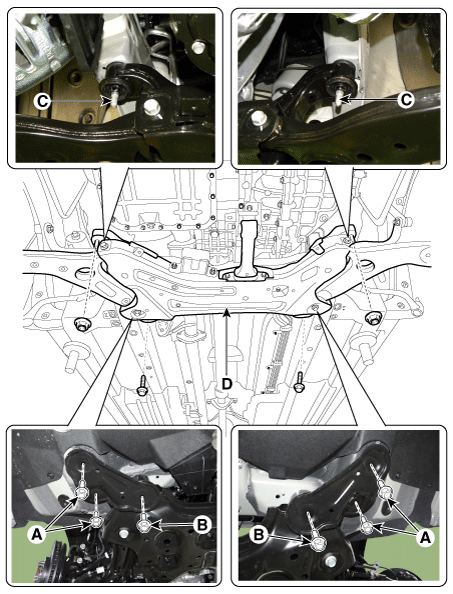
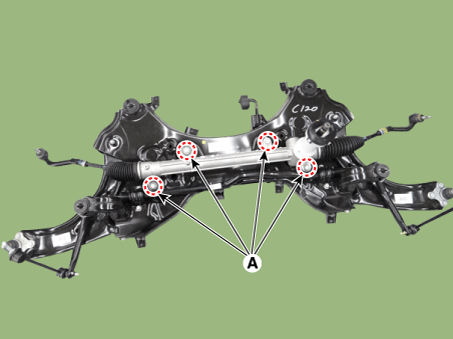
| 11. |
Loosen the bolts and nuts and then remove the sub frame (D).
|
Tightening torque:
(A) 44.1 - 58.8 N·m (4.5 - 6.0 kgf·m, 32.5 - 43.4 lb·ft)
(B, C) 176.5 - 196.1 N·m (18.0 - 20.0 kgf·m, 130.2 - 144.7 lb·ft)
|
|
| 12. |
Loosen the screw (A) and then remove the heat protector.
|
Tightening torque:
7.8 - 11.8 N.m (0.8 - 1.2 kgf.m, 5.8 - 8.7 lb-ft)
|
|
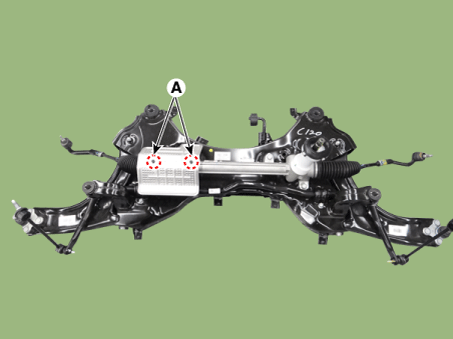
| 13. |
Loosen the mounting bolt (A) and then remove the gear box.
|
Tightening torque:
88.3 - 107.9 N·m (9.0 - 11.0 kgf·m, 65.1 - 79.6 lb·ft)
|
|
| 14. |
Loosen the stabilizer bar mounting bolts (A) and then remove the stabilizer
bar.
|
Tightening torque:
49.0 - 63.7 N·m (5.0 - 6.5 kgf·m, 36.2 - 47.0 lb·ft)
|
|
| 15. |
Install in the reverse order of removal.
|
| 16. |
Check the wheel alignment.
(Refer to Tires/Wheels - "Alignment")
|
Removal
1.
Remove wheel nuts, wheel and tire (A) from hub.
Tightening torque:
107.9 - 127.5 N·m (11.0 - 13.0 kgf·m, 79.6 - 9 ...
Removal
1.
Remove wheel nuts, wheel and tire (A) from hub.
Tightening torque:
107.9 - 127.5 N·m (11.0 - 13.0 kgf·m, 79.6 - 9 ...
Other information:
Component Location
1. Tailgate trim
...
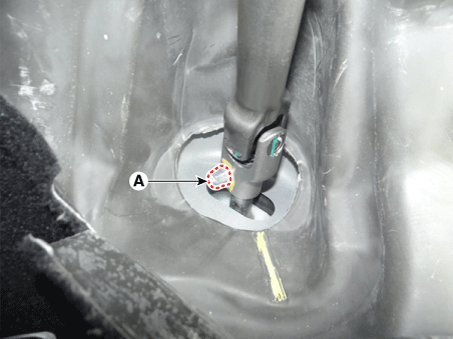
Inspection
Check whether the stroke is within specification when the parking brake pedal
is depressed with 66 lb, 294 N(30 kg) of force. Also, the parking brake alone
should securely hold the vehicle on a fairly steep grade. If the stroke is more
or less than specified, have ...

 Front Lower Arm Repair procedures
 Sub Frame Repair procedures