Kia Sportage: Cooling System / Cooling Fan Repair procedures
Kia Sportage QL (2015-2026) Service Manual / Engine Mechanical System / Cooling System / Cooling Fan Repair procedures
| Removal and Installation |
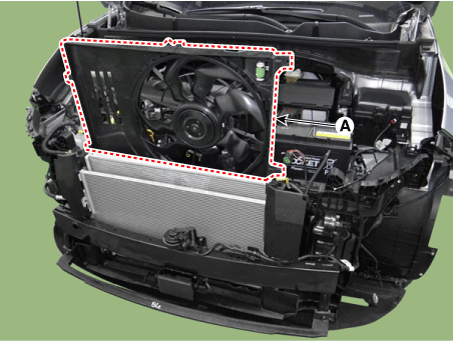
Cooling fan assembly
| 1. |
Disconnect the battery negative terminal.
|
| 2. |
Remove the air duct.
(Refer to Intake and Exhaust System - "Air Cleaner")
|
| 3. |
Remove the front bumper cover.
(Refer to Body - "Front Bumper Cover")
|
| 4. |
Remove the head lamps.
(Refer to Body Electrical System - “Head Lamps”)
|
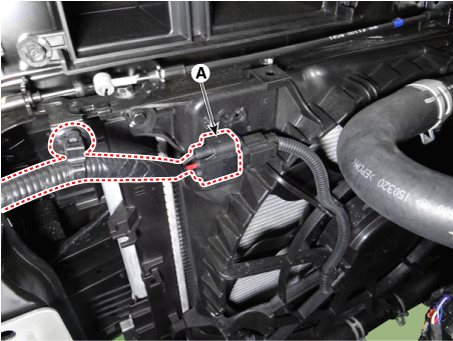
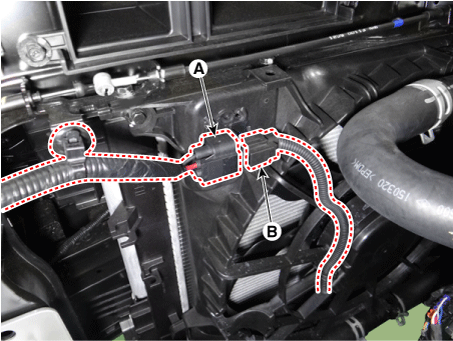
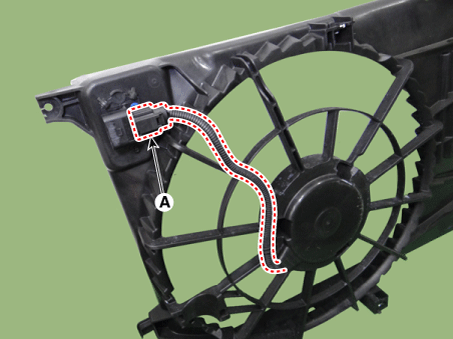
| 5. |
Disconnect the cooling fan connector (A).
|
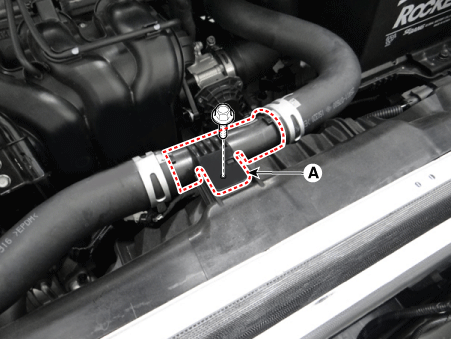
| 6. |
Separate the radiator upper hose connector (A) from the cooling fan
assembly.
|
| 7. |
Disconnect the hood lower latch connector (A).
|

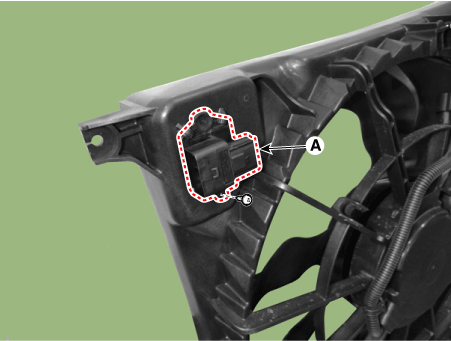
| 8. |
Disconnect the hood latch release handle cable (A).
|
| 9. |
Disconnect the front impact sensor (FIS) connector.
(Refer to Restraint - "front impact sensor (FIS)")
|
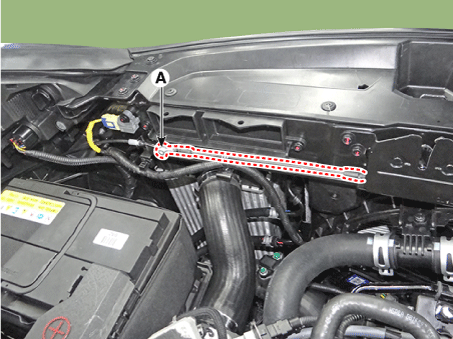
| 10. |
Remove the radiator support upper member (A).
|
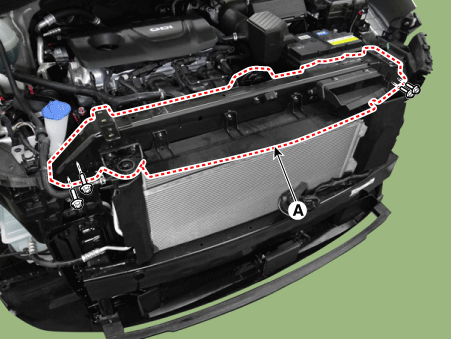
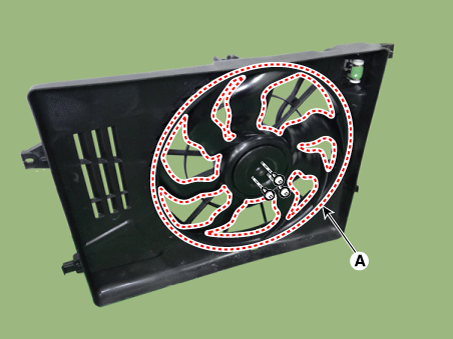
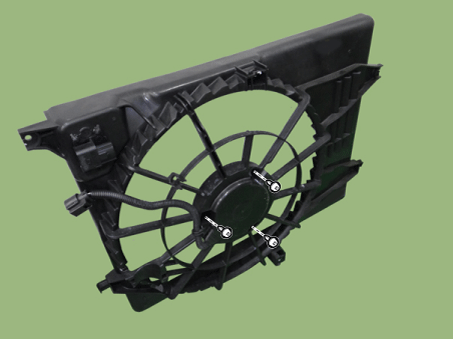
| 11. |
Remove the cooling fan assembly (A).
|
| 12. |
Install in the reverse order of removal.
|
Resistor
| 1. |
Disconnect the wire harness connector (A) and the fan motor connector
(B).
|
| 2. |
Remove the resistor (A) from the cooling fan shroud.
|
| 3. |
Install in the reverse order of removal.
|
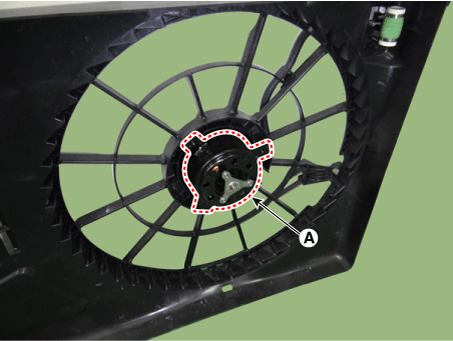
| Disassembly |
| 1. |
Remove the cooling fan (A) from the cooling fan assembly.
|
| 2. |
Disconnect the fan motor connector (A) from the resistor.
|
| 3. |
Remove the fan motor (A) from the cooling fan shroud.
|
| 4. |
Assemble in the reverse order of disassembly.
|
| Inspection |
| Fan Motor |
| 1. |
Disconnect the fan motor connector from the resistor.
|
| 2. |
Connect the battery voltage to the "+" terminal and ground to "-" terminal.
|
| 3. |
Check the cooling fan motor operates well.
|
 Cooling Fan Schematic diagrams
Circuit Diagram
...
 Reservoir Tank Repair procedures
Removal and Installation
1.
Disconnect the radiator reservoir hose (A), and then drain the coolant
from the reservoir tank.
2.
Disc ...
Other information:
Kia Sportage QL (2015-2026) Service Manual: CVVT & Camshaft Description and operation
Description Electric E-CVVT system is electric continuous variable valve timing system. It is located on the intake camshaft of the engine and uses motor rotation to control the rotation angle of camshaft relative to the rotation of crankshaft regardless of engine pressure. ...
Kia Sportage QL (2015-2026) Owners Manual: Operating conditions
Select RCTA (Rear Cross Traffic Alert) in "User Settings" under "Driving Assist" on the instrument cluster. The system will turn on and standby to activate. Select RCTA again, to turn the system off. If the vehicle is turned off, the RCTA system will remember the last ...
Copyright © www.ksportagegl.com 2015-2026
