Kia Sportage: Air conditioning System / Condenser Repair procedures
Kia Sportage QL (2015-2026) Service Manual / Heating,Ventilation And Air Conditioning / Air conditioning System / Condenser Repair procedures
| Inspection |
| 1. |
Check the condenser fins for clogging and damage. If clogged, clean
with water, and blow dry with compressed air. If bent, gently smooth
out using a screwdriver or pliers.
|
| 2. |
Check the condenser connections for leakage, and repair or replace it,
if required.
|
| Replacement |
| 1. |
Recover the refrigerant with a recovery/recycling/charging station.
|
| 2. |
Disconnect the negative (-) battery terminal.
|
| 3. |
Remove the front bumper.
(Refer to Body - "Front Bumper Cover")
|
| 4. |
Remove the air intake shield (A) after loosening the clips.
|

| 5. |
Remove the discharge line (A) and liquid line (B) after loosening the
nuts.
|
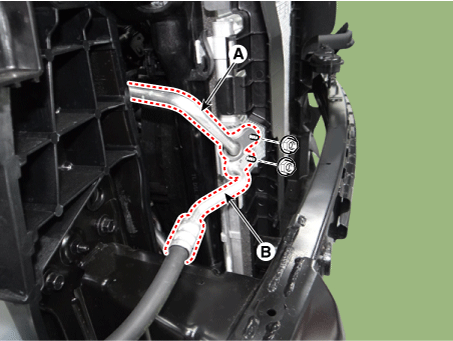

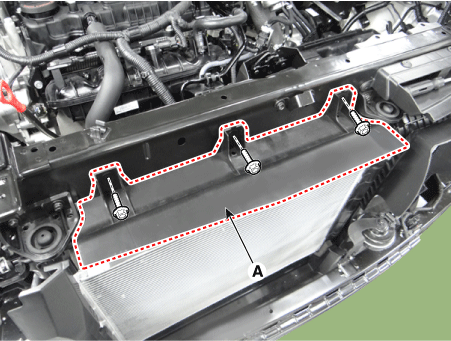
| 6. |
Remove the air upper guard (A) after loosening the bolts.
|
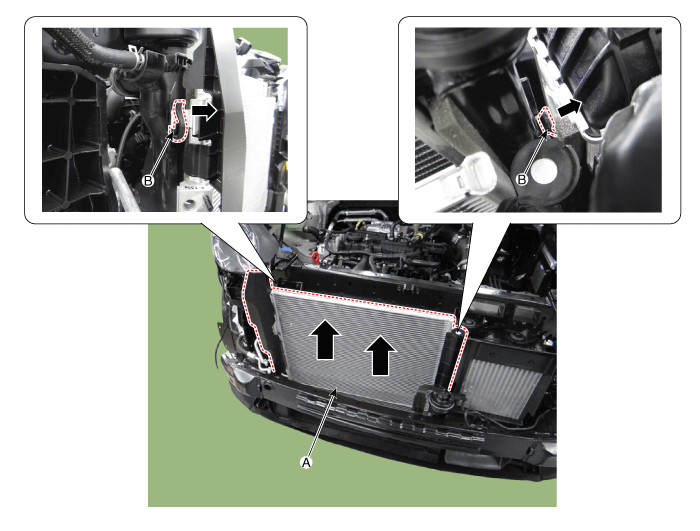
| 7. |
Remove the condenser (A) by pushing the locking pin (B) from radiator
assembly.
|
| 8. |
Install in the reverse order of removal.
|
 Condenser Components and components location
Components
1. Condenser
...
 Receiver-Drier Repair procedures
Replacement
1.
Remove the condenser.
2.
Remove the cap (B) from the bottom of the condenser using an L wrench
(A).
...
Other information:
Kia Sportage QL (2015-2026) Service Manual: Sunvisor Repair procedures
Replacement Put on gloves to protect your hands. • Use a plastic panel removal tool to remove inter ...
Kia Sportage QL (2015-2026) Service Manual: Components and components location
Components 1. Rear door trim 2. Rear door panel & module 3. Rear door division channel 4. Rear door fixed glass 5. Rear door body side weatherstrip 6. Rear door side weatherstrip 7. Rear door frame moulding 8. Rear door belt outsid ...
Copyright © www.ksportagegl.com 2015-2026
