Kia Sportage: Interior Trim / Center Pillar Trim Repair procedures
[Center pillar lower trim]
|
Put on gloves to protect your hands.
|
| • |
Use a plastic panel removal tool to remove interior trim pieces
without marring the surface.
|
| • |
Take care not to bend or scratch the trim and panels.
|
|
| 1. |
Remove the front door scuff trim.
(Refer to Interior Trim - "Door Scuff Trim")
|
| 2. |
Remove the rear door scuff trim.
(Refer to Interior Trim - "Door Scuff Trim")
|
| 3. |
Carefully remove the front door body side weatherstrip.
|
| 4. |
Carefully remove the rear door body side weatherstrip.
|
| 5. |
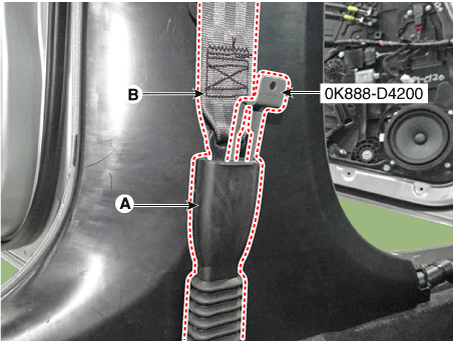
Remove the seat belt (B) from the EFD system by using the SST (0K888-D4200).
|
| 6. |
Using a remover, remove the center pillar lower trim (A).
|
| 7. |
Install in the reverse order of removal.
| •
|
Make sure that the connector is plugged in properly.
|
| •
|
Replace any damaged clips.
|
|
|
[Center pillar upper trim]
|
Put on gloves to protect your hands.
|
| • |
Use a plastic panel removal tool to remove interior trim pieces
without marring the surface.
|
| • |
Take care not to bend or scratch the trim and panels.
|
|
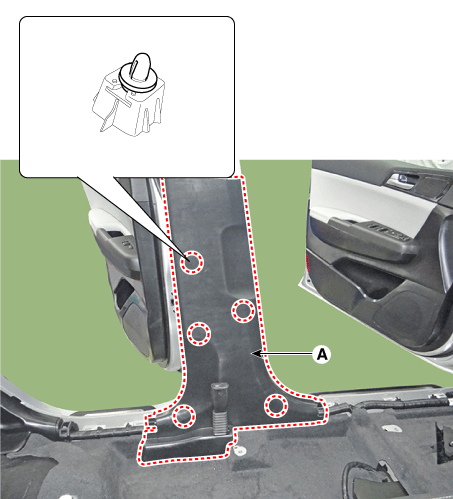
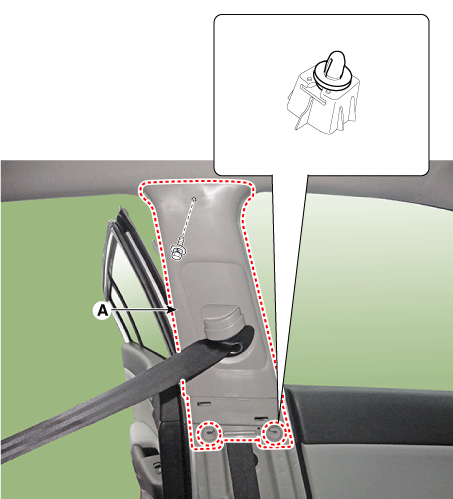
| 1. |
Remove the center poller lower trim.
|
| 2. |
Remove the center pillar lower trim (A) after loosening the bolt.
|
| 3. |
Install in the reverse order of removal.
|
Make sure that the connector is plugged in properly.
|
|
Component Location
1. Center pillar lower trim
2. Center pillar upper trim
...
Component Location
1. Rear transverse trim
...
Other information:
- The radar or the camera is contaminated with foreign substances.
- It heavily rains or snows.
- There is electromagnetic interference.
- Something in the path of travel deflects the radar waves.
- The vehicle is in a construction area or near a rail road and certain metal objects
are on the ...
Inspection
Vapor hose
1.
Check all the clamps for tightness and the connections for leakage.
2.
Visually check the vapor lines and hoses for cracks, leaks, loose connections,
or deformation.
Fuel filler cap
...


 Center Pillar Trim Components and components location
 Rear Transverse Trim Components and components location