
Kia Sportage: Manual heating and air conditioning / Temperature control
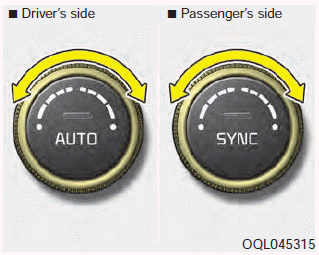
The temperature will increase to the maximum (HI) by turning the knob to the extreme right.
The temperature will decrease to the minimum (Lo) by turning the knob to the extreme left.
When turning the knob, the temperature will increase or decrease by 1°F/0.5°C. When set to the lowest temperature setting, the air conditioning will operate continuously.
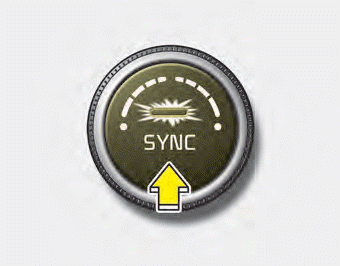
Adjusting the driver and passenger side temperature equally
- Press the “SYNC” button to adjust the driver and passenger side temperature
equally.
The passenger side temperature will be set to the same temperature as the driver side temperature. - Turn the driver side temperature control knob. The driver and passenger side temperature will be adjusted equally.
Adjusting the driver and passenger side temperature individually
- Press the “SYNC” button again to adjust the driver and passenger side temperature individually. The illumination of button turns off.
- Operate the driver side temperature control knob to adjust the driver side temperature.
- Operate the passenger side temperature control knob to adjust the passenger side temperature.
Temperature conversion
You can switch the temperature mode from Centigrade to Fahrenheit as follows:
While pressing the OFF button, press the AUTO button for 3 seconds or more.
The display will change from Centigrade to Fahrenheit, or from Fahrenheit to Centigrade.
If the battery has been discharged or disconnected, the temperature mode display will reset to Fahrenheit.
 Mode selection
The mode selection button controls the direction of the air flow through the
ventilation system.
The air flow outlet port is converted as follows:
Refer to the illustration in the “Manual cl ...
 Air intake control
This is used to select the outside (fresh) air position or recirculated air position.
To change the air intake control position, push the control button.
Outside (fresh) air position
With the o ...
Other information:
Kia Sportage QL (2015-2026) Owners Manual: Headrest (for front seat)
The driver's and front passenger's seats are equipped with a headrest for the occupant's safety and comfort. The headrest not only provides comfort for the driver and front passenger, but also helps protect the head and neck in the event of a rear collision. For maximum effective ...
Kia Sportage QL (2015-2026) Owners Manual: Rear window wiper blade
1. Raise the wiper arm and pull out the wiper blade assembly. 2. Install the new blade assembly by inserting the center part into the slot in the wiper arm until it clicks into place. 3. Make sure the blade assembly is installed firmly by trying to pull it slightly. To prevent damage to the ...
