Kia Sportage: Power Tailgate System / PTG Spindle Repair procedures
Kia Sportage QL (2015-2026) Service Manual / Body Electrical System / Power Tailgate System / PTG Spindle Repair procedures
| Removal |
| 1. |
Disconnect the negative (-) battery terminal.
|
| 2. |
Remove the rear pillar trim.
(Refer to Body - "Rear Pillar Trim")
|
| 3. |
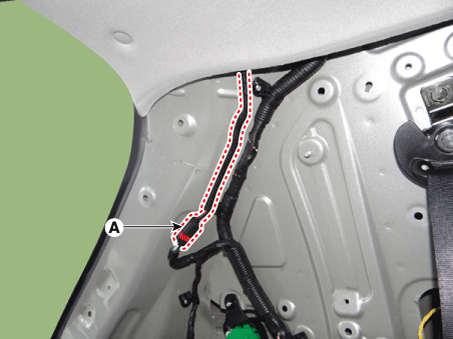
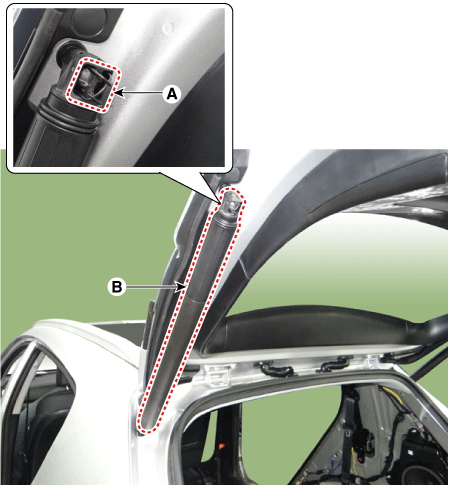
Disconnect the PTG spindle connector (A).
|
| 4. |
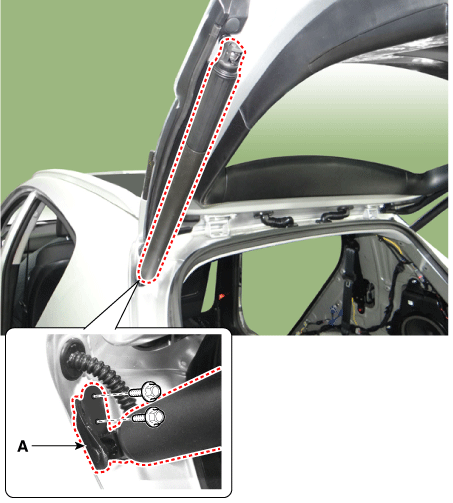
Using a screwdriver, lift the socket clips (A) up slightly.
|
| 5. |
Remove the PTG spindle assembly (B).
|

| 6. |
If it is necessary, remove the nuts and replace the PTG spindle bracket
(A).
|
| Installation |
| 1. |
Install the PTG spindle bracket.
|
| 2. |
Install the PTG spindle assembly.
|
| 3. |
Connect the PTG spindle connector.
|
| 4. |
Install the rear pillar trim.
|
| 5. |
Connect the negative (-) battery terminal.
|
| Inspection |
Inspection of the PTG Spindle
Refer to Power Tailgate System - "Troubleshooting"
 Anti-Pinch Strip Repair procedures
Removal
1.
Disconnect the negative (-) battery terminal.
2.
Remove the tailgate upper trim.
(Refer to Body - "Tailgate Tri ...
 Power Windows
...
Other information:
Kia Sportage QL (2015-2026) Service Manual: Engine Coolant Temperature Sensor (ECTS) Specifications
Specification Temperature Resistance (kΩ) °C °F -40 -40 48.14 -20 -4 14.13 - 16.83 0 32 5.79 ...
Kia Sportage QL (2015-2026) Service Manual: Specifications
Specification Items Inner side Outer side Front driveshaft Joint type NU 2.0 A/T BJ #24 VTJ #24 NU 2.0 M/T 2WD BJ #25 VTJ #25 ...
Copyright © www.ksportagegl.com 2015-2026
