Kia Sportage: Crash Pad / Main Crash Pad Assembly Repair procedures
Kia Sportage QL (2015-2026) Service Manual / Body (Interior and Exterior) / Crash Pad / Main Crash Pad Assembly Repair procedures
| Replacement |
Put on gloves to protect your hands.
|

|

| 1. |
Remove the floor console assembly.
(Refer to Floor Console - "Floor Console Assembly")
|
| 2. |
Remove both sides of the front pillar trim.
(Refer to Body - "Front Pillar Trim")
|
| 3. |
Remove the crash pad lower panel.
(Refer to Crash Pad - "Crash Pad Lower Panel")
|
| 4. |
Remove the crash pad lower panel.
(Refer to Crash Pad - "Crash Pad Lower Panel")
|
| 5. |
Remove the glove box housing.
(Refer to Crash Pad - "Glove Box Housing")
|
| 6. |
Remove the center fascia panel.
(Refer to Crash Pad - "Center Fascia Panel")
|
| 7. |
Remove the heater & A/C control unit .
(Refer to Heating,Ventilation, Air Conditioning - "Heater & A/C Control
Unit (MANUAL)")
(Refer to Heating,Ventilation, Air Conditioning - "Heater & A/C Control
Unit (DATC)")
|
| 8. |
Remove the crash pad center lower panel.
(Refer to Crash Pad - "ash Pad Center Panel")
|
| 9. |
Remove the steering wheel.
(Refer to Steering System - "Steering Wheel")
|
| 10. |
Remove the steering column shroud lower panel.
(Refer to Crash Pad - "Steering Column Shroud Panel")
|
| 11. |
Remove the front pillar trim.
(Refer to Interior Trim - "Front Pillar Trim")
|
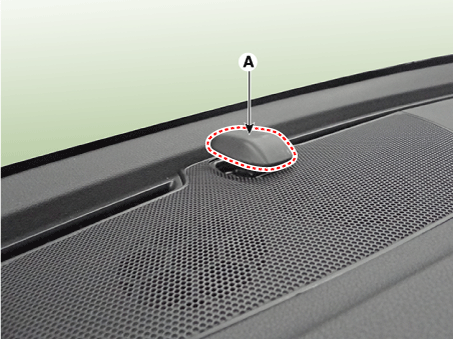
| 12. |
Using a remover, separate the photo sensor (A).
|
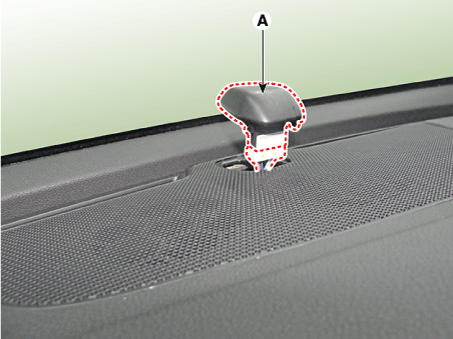
| 13. |
Remove the photo sensor (A), after disconnecting the photo sensor connector.
|
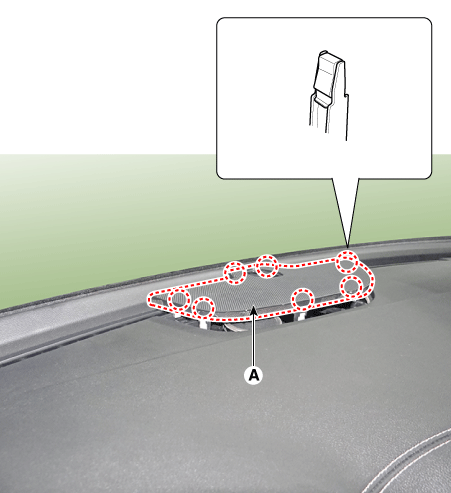
| 14. |
Using a remover and remove the center speaker grill (A).
|
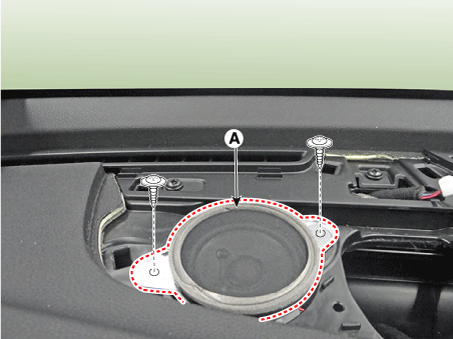
| 15. |
Separate the center speaker (A) after loosening the screws.
|
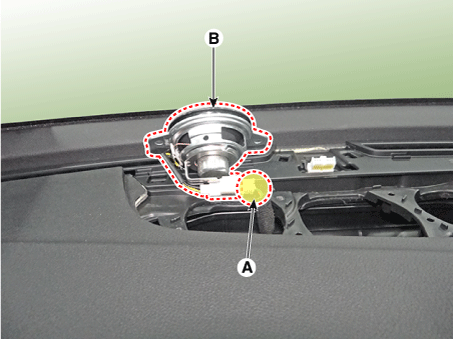
| 16. |
Remove the center speaker (B), after disconnecting the connector (A).
|
| 17. |
Remove the passenger airbag (C), after loosening the mounting bolts
(A) and disconnecting the connector (B).
|
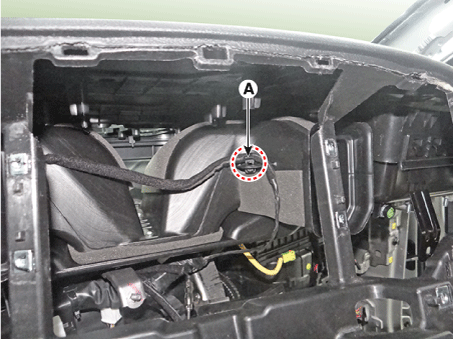
| 18. |
Disconnect the wiring mounting clip (A).
|
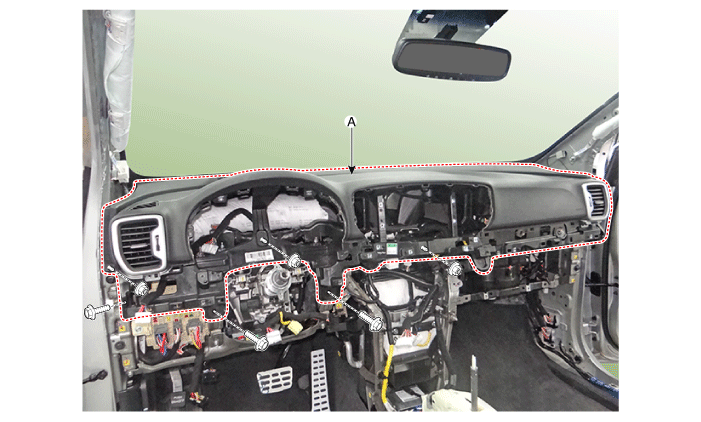
| 19. |
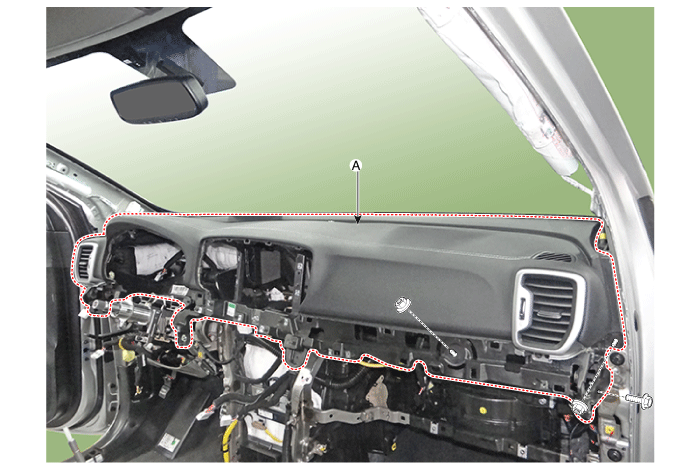
Remove the main crash pad assembly (A), after loosening the mounting
bolts and nuts.
[LH]
[RH]
|
| 20. |
Install in the reverse order of removal.
|
 Main Crash Pad Assembly Components and components location
Component Location
1. Crash pad main lower panel
...
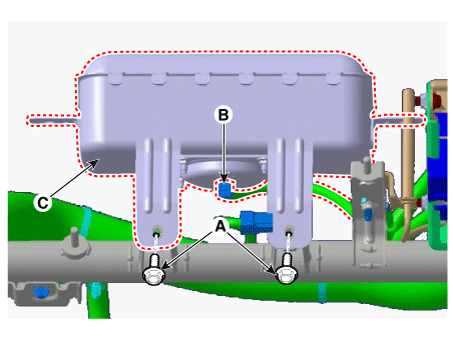
 Cowl Cross Bar Assembly Components and components location
Component Location
1. Cowl cross bar assembly
...
Other information:
Kia Sportage QL (2015-2026) Service Manual: Crankshaft Repair procedures
Disassembly In case of removing the high pressure fuel pump, high pressure fuel pipe, delivery pipe, and injector, there may be injury caused by leakage of the high pressure fuel. So don’t do any repa ...
Kia Sportage QL (2015-2026) Service Manual: Rear Glass Defogger Printed Heater Repair procedures
Inspection • Wrap tin foil around the end of the voltmeter test lead to prevent damaging the heater line. Apply pressure on the tin foil with hand and move the tin foil al ...
Copyright © www.ksportagegl.com 2015-2026
