Kia Sportage: Ignition System / Ignition Coil Schematic diagrams
| • |
( ) : Without Immobilizer & Smart Key
|
| • |
[ ] : With Immobilizer & Smart Key
|
|
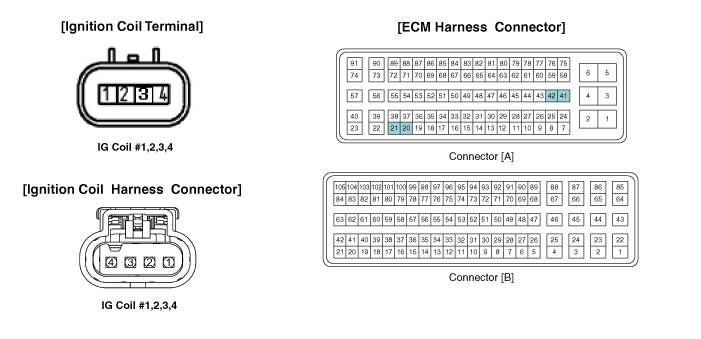
| Ignition Coil Terminal Function |
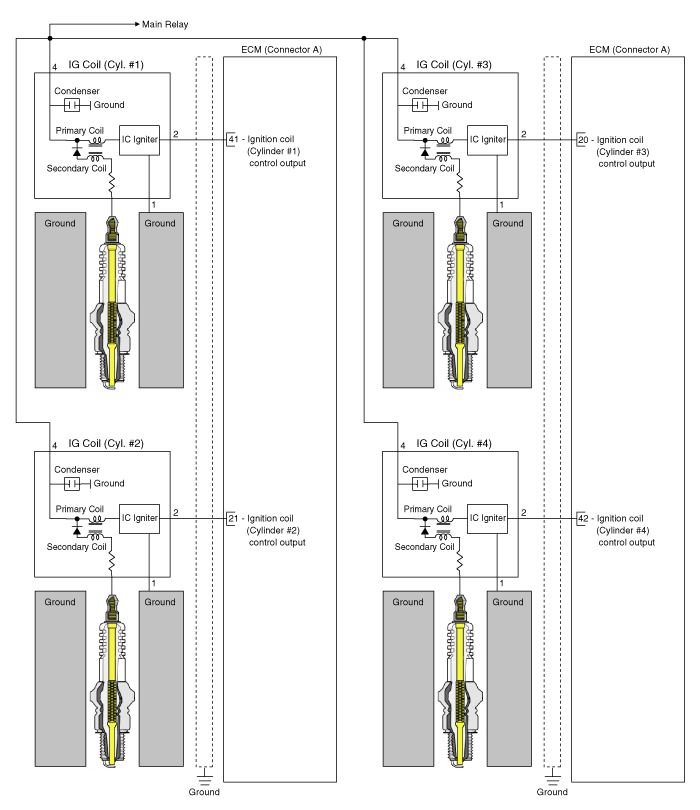
Ignition Coil (Cylinder #1)
Pin No.
|
Description
|
Connected to
|
1
|
Ground
|
Chassis
|
2
|
ignition Coil #1 Control output
|
ECM Connector A (42) [41]
|
3
|
-
|
|
4
|
Battery power (B+)
|
Main Relay
|
Ignition Coil (Cylinder #2)
Pin No.
|
Description
|
Connected to
|
1
|
Ground
|
Chassis
|
2
|
ignition Coil #2 Control output
|
ECM Connector A (20) [21]
|
3
|
-
|
|
4
|
Battery power (B+)
|
Main Relay
|
Ignition Coil (Cylinder #3)
Pin No.
|
Description
|
Connected to
|
1
|
Ground
|
Chassis
|
2
|
ignition Coil #3 Control output
|
ECM Connector A (21) [20]
|
3
|
-
|
|
4
|
Battery power (B+)
|
Main Relay
|
Ignition Coil (Cylinder #4)
Pin No.
|
Description
|
Connected to
|
1
|
Ground
|
Chassis
|
2
|
ignition Coil #4 Control output
|
ECM Connector A (41) [42]
|
3
|
-
|
|
4
|
Battery power (B+)
|
Main Relay
|
| • |
( ) : Without Immobilizer & Smart Key
|
| • |
[ ] : With Immobilizer & Smart Key
|
|
Description
An ignition coil is an induction coil in an engine's ignition system which transforms
the battery's low voltage to the high voltage needed to create an electric ...
Removal
1.
Turn ignition switch OFF and disconnect the negative (-) battery terminal.
2.
Remove the engine cover.
3 ...
Other information:
Inspection
1.
Measure the resistance between the terminals.
2.
If the measured resistance is not within specification, the blower resistor
must be replaced (after removing the resistor).
Replacement
...
Circuit Diagram
[Driver power seat switch]
[Assist power seat switch]
...

 Ignition Coil Description and operation
 Ignition Coil Repair procedures