Kia Sportage: Controller / Heater & A/C Control Unit (DATC) Repair procedures
Kia Sportage QL (2015-2026) Service Manual / Heating,Ventilation And Air Conditioning / Controller / Heater & A/C Control Unit (DATC) Repair procedures
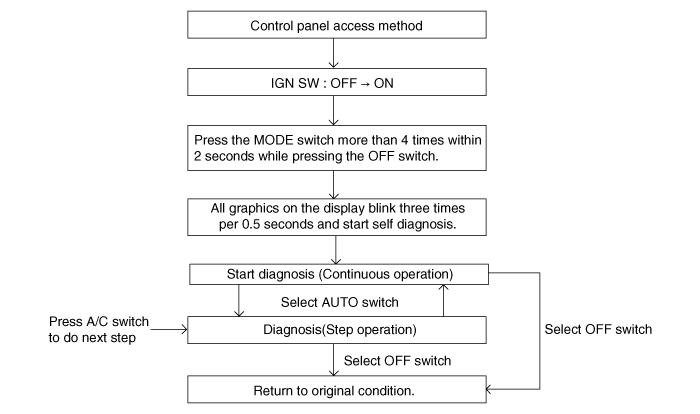
| Self Diagnosis |
| 1. |
Self-diagnosis process
|
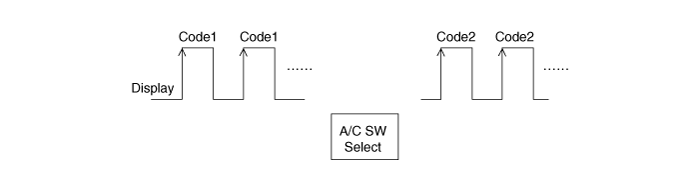
| 2. |
How to read self-diagnostic code
After the display panel flickers three times at 0.5 second intervals,
the corresponding fault code flickers on the setup temperature display
panel at 0.5 second intervals and two digit figure will be displayed.
Codes are indicated in numerical format.
|
| 3. |
Fault code display
|


| 4. |
If fault codes are displayed during the check up, inspect possible causes
of malfunction by referring to fault codes.
|
| 5. |
Fail safe
|
| Replacement |
| 1. |
Disconnect the negative (-) battery terminal.
|
| 2. |
Remove the crash pad lower panel.
(Refer to Body - "Crash Pad Lower Panel")
|
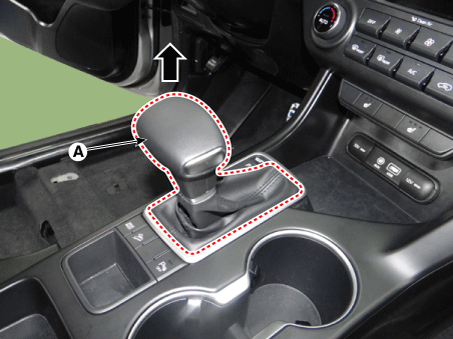
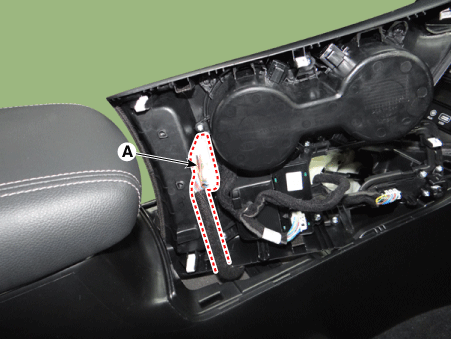
| 3. |
Remove the shift lever knob (A).
|
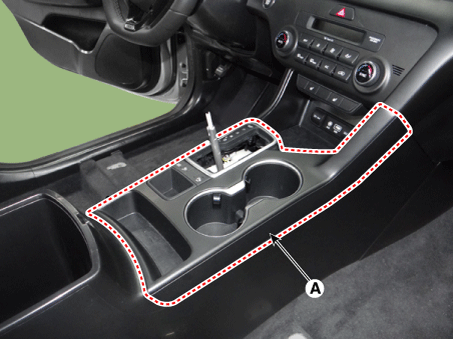
| 4. |
Using a screw driver or remover, remove the console upper cover (A).
|
| 5. |
Disconnect the console upper cover connector (A).
|
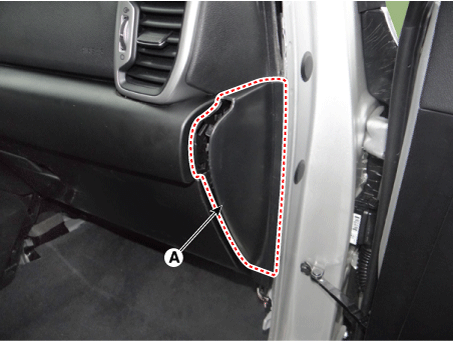
| 6. |
Using a screw driver or remover, remove the crash pad side cover[RH]
(A).
|
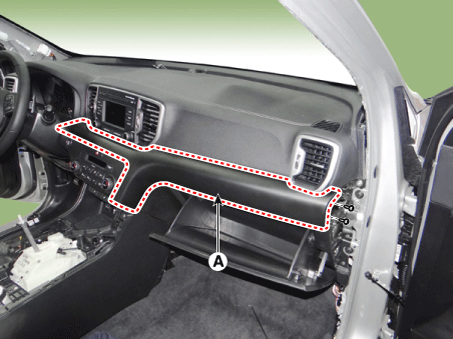
| 7. |
Remove the crash pad garnish (A) after loosening the screws.
|
| 8. |
Remove the center fascia lower panel (A) after loosening the screws.
|

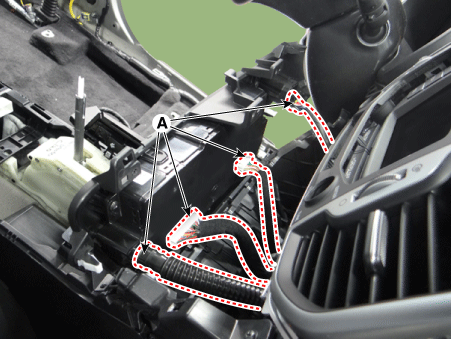
| 9. |
Disconnect the connectors (A).
|
| 10. |
Remove the heater & A/C control unit (A) after loosening the screws.
|
| 11. |
Install in the reverse order of removal.
|

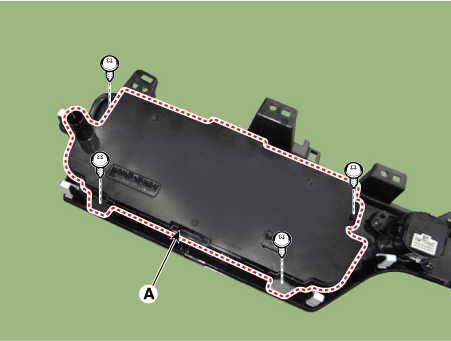
 Heater & A/C Control Unit (DATC) Components and components location
Components (1)
[AUDIO Type]
Connector Pin Function
Connector
Pin NO
Function
Connector
Pin NO
...
 Heater
...
Other information:
Kia Sportage QL (2015-2026) Service Manual: Variable Charge Motion Actuator (VCMA) Components and components location
Components ECM directly controls the actuator and VCM flap for link-structure intake manifold is operated when motor rotates. This creates air tumble. Motor and position sensor are mounted inside the actuator in order to receive the position of flap and send feedback to ECM. ...
Kia Sportage QL (2015-2026) Service Manual: CVVT (Continuously Variable Valve Timing) System Repair procedures
Inspection E-CVVT motor [Bank1/Intake] Refer to Engine Control / Fuel System - "E-CVVT motor" CVVT Oil Control Valve (OCV) [Bank1/Exhaust] Refer to Engine Control / Fuel System - "CVVT Oil Control Valve (OCV) [Bank1/Exhaust]" ...
Copyright © www.ksportagegl.com 2015-2026
