Kia Sportage: Keyless Entry And Burglar Alarm / Repair procedures
Kia Sportage QL (2015-2026) Service Manual / Body Electrical System / Keyless Entry And Burglar Alarm / Repair procedures
| Inspection |
|

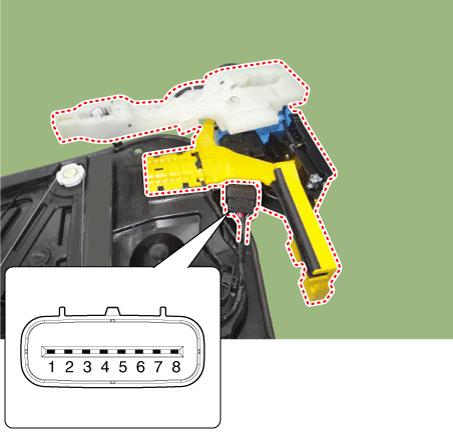
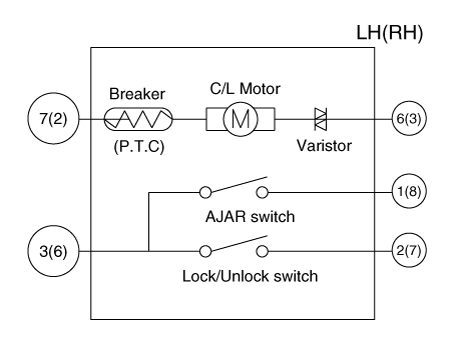
Front Door Lock Module Inspection
| 1. |
Remove the front door trim.
(Refer to Body - "Front Door Trim")
|
| 2. |
Remove the front door module.
(Refer to Body - "Front Door Module")
|
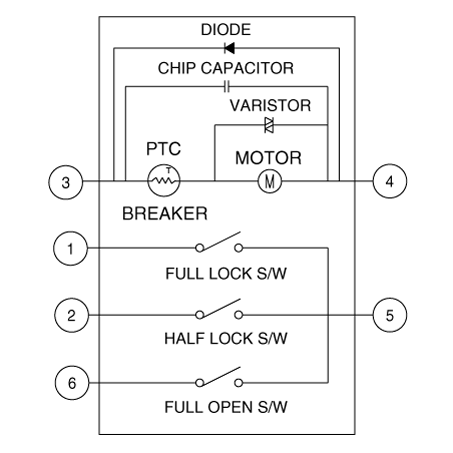
| 3. |
Disconnect the connector from the actuator.
|
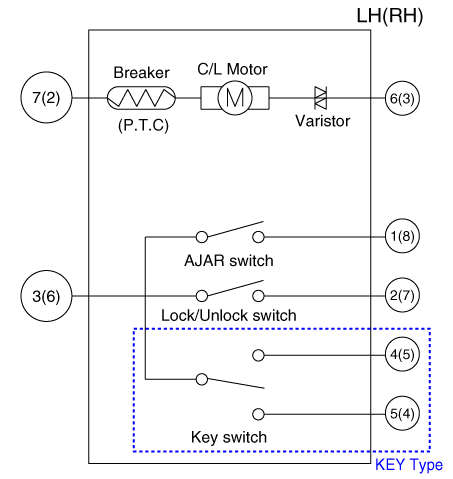
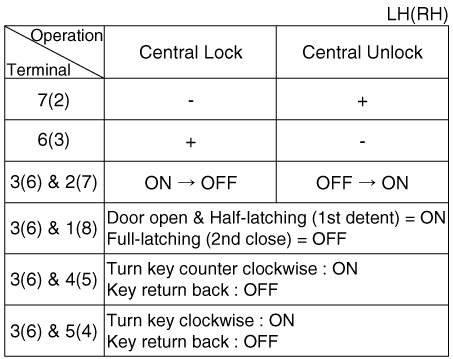
|||||||||||||||||||||||||||||
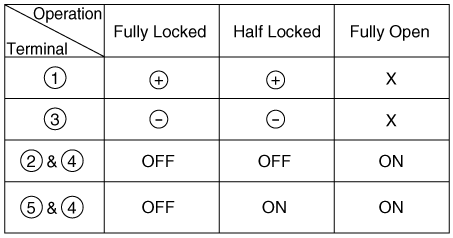
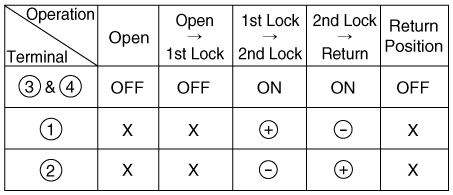
| 4. |
Check actuator operation by connecting power and ground as shown below.
To prevent damage to the actuator, apply battery voltage only momentarily.
|
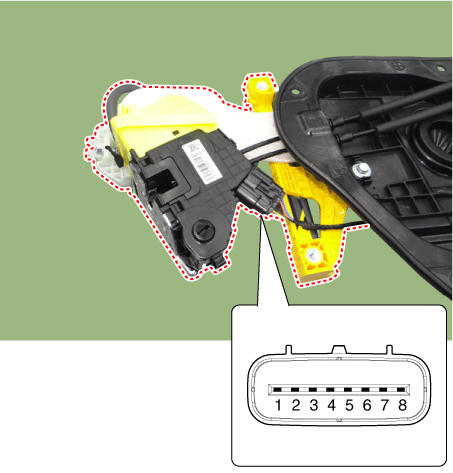
Rear Door Lock Module Inspection
| 1. |
Remove the rear door trim.
(Refer to Body - "Rear Door Trim")
|
| 2. |
Remove the rear door module.
(Refer to Body - "Rear Door Module")
|
| 3. |
Disconnect the connector from the actuator.
|
|||||||||||||||||||||||||||||
| 4. |
Check actuator operation by connecting power and ground as shown below.
To prevent damage to the actuator, apply battery voltage only momentarily.
|
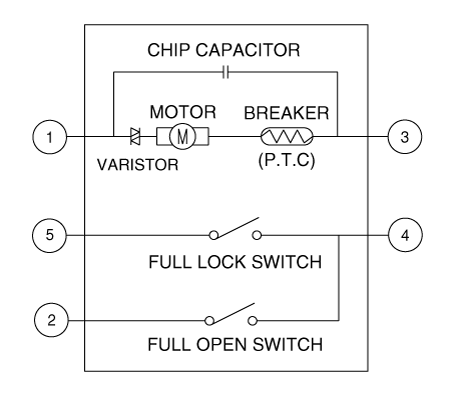
Tailgate Lock Module Inspection
| 1. |
Remove the tailgate trim.
(Refer to Body - "Tailgate Trim")
|
| 2. |
Disconnect the connectors from the actuator.
[Tailgate Latch]
[Power Tailgate Latch (Option)]
[Power Tailgate Control Unit (Option)]
|
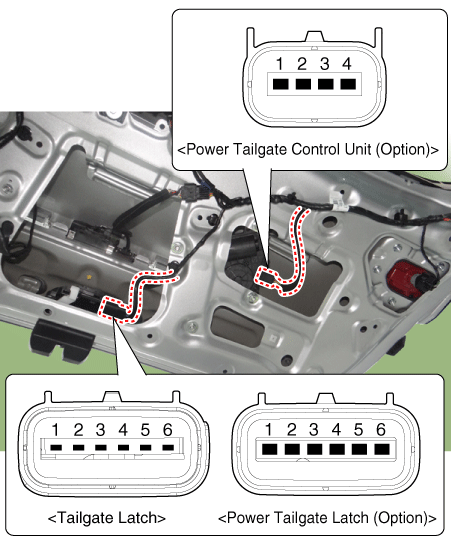
| 3. |
Check actuator operation by connecting power and ground as shown below.
To prevent damage to the actuator, apply battery voltage only momentarily.
[Tailgate Latch]
[Power Tailgate Latch (Option)]
[Power Tailgate Control Unit (Option)]
|
| 4. |
Checking the tailgate of the vehicle power option power refers to the
tailgate module.
|
Tailgate Open Switch Inspection
| 1. |
Disconnect the negative (-) battery terminals.
|
| 2. |
Remove the tailgate trim
(Refer to Body - "Tailgate Trim")
|
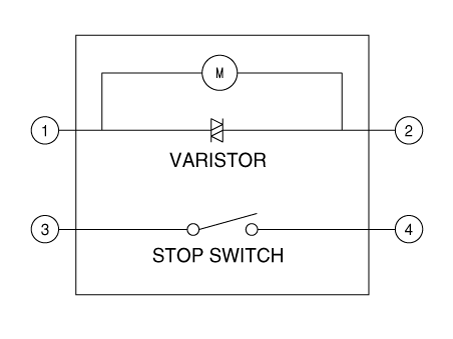
| 3. |
Disconnect the tailgate open switch assembly connector.
|
| 4. |
Check for continuity between terminals in half latching condition as
shown below.
|

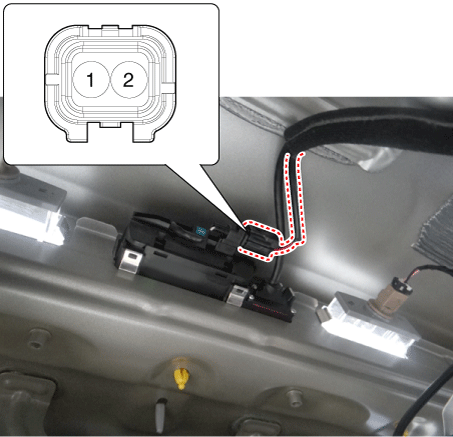
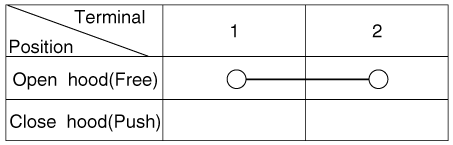
Hood Switch Inspection
| 1. |
Disconnect the hood switch connector (A).
|
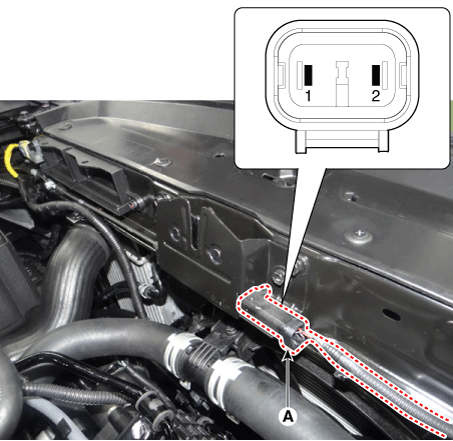
| 2. |
Check for continuity between the terminals and ground as shown below.
(Refer to Body - "Hood Latch Assembly")
|
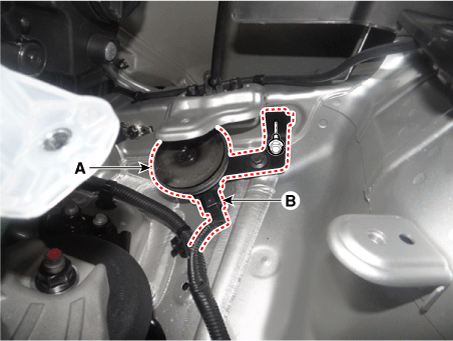
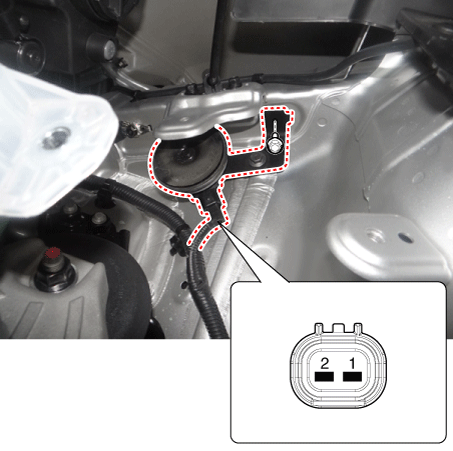
Burglar Horn Inspection
| 1. |
Remove the burglar horn (A) after loosening the mounting bolt and disconnecting
the connector (B).
|
| 2. |
Test the burglar horn by connecting battery power to the terminal 2
and ground the terminal 1.
|
 Description and operation
Description
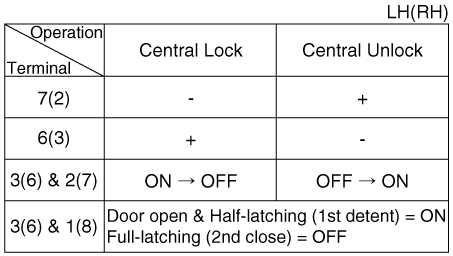
Burglar Alarm State [B/A State]
B/A State
Description
DISARM
1)
This is the state wh ...

Other information:
Kia Sportage QL (2015-2026) Owners Manual: Tire rotation
To equalize tread wear, it is recommended that the tires be rotated every 7,500 miles (12,000 km) or sooner if irregular wear develops. During rotation, check the tires for correct balance. When rotating tires, check for uneven wear and damage. Abnormal wear is usually caused by incorrect tire ...
Kia Sportage QL (2015-2026) Owners Manual: Closing the hood
1. Before closing the hood, check the following: All filler caps in engine compartment must be correctly installed. Gloves, rags or any other combustible material must be removed from the engine compartment. 2. Return the support rod to its clip to prevent it from rattling. 3.Lower the ...
Copyright © www.ksportagegl.com 2015-2026
