Kia Sportage: Fuel Delivery System / Fuel Tank Repair procedures
Kia Sportage QL (2015-2026) Service Manual / Engine Control / Fuel System / Fuel Delivery System / Fuel Tank Repair procedures
| Removal |
| 1. |
Release the residual pressure in fuel lin.
(Refer to the Fuel Delivery System - Repair Procedures - "Release Residual
Pressure in Fuel Line")
|
| 2. |
Remove the rear seat cushion (Refer to "Seat" in BD group).
|
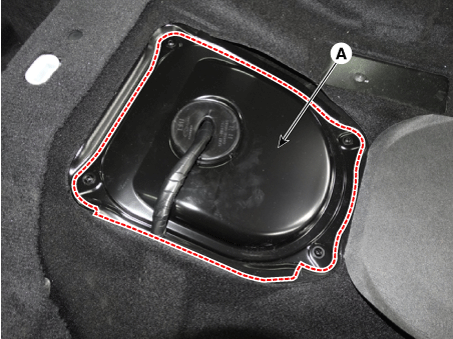
| 3. |
Remove the fuel pump service cover (A).
|
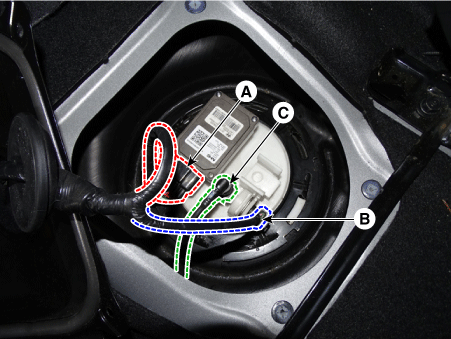
| 4. |
Disconnect the fuel pump control module connector (A).
|
| 5. |
Disconnect the fuel pressure sensor connector (B).
|
| 6. |
Disconnect the fuel feed tube quick connector (C).
|
| 7. |
Lift the vehicle and support the fuel tank with a jack.
|
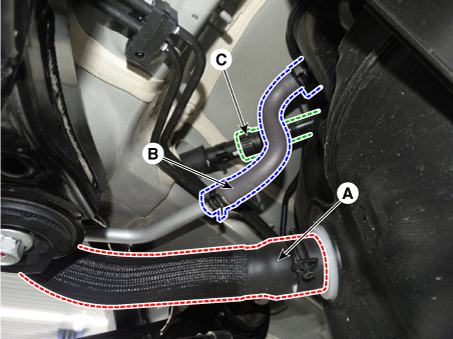
| 8. |
Disconnect the fuel filler hose (A).
|
| 9. |
Disconnect the ventilation tube (B).
|
| 10. |
Disconnect the leveling hose quick connector (C).
|
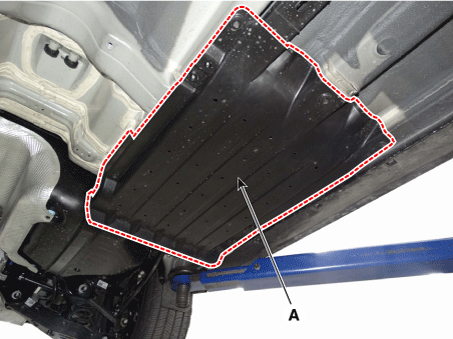
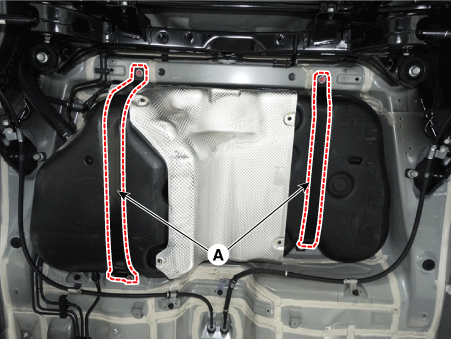
| 11. |
Remove the under cover (A) after loosening the mounting nuts.
|
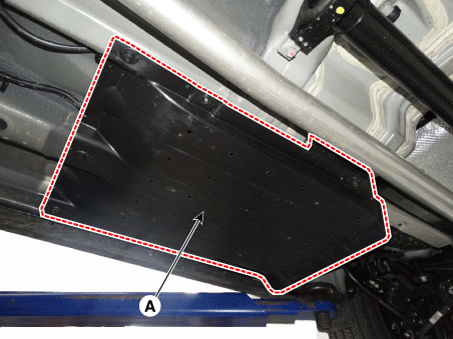
| 12. |
Remove the fuel tank from the vehicle after removing the fuel tank band
(A).
|

| Installation |
| 1. |
Install in the reverse order of removal.
|
 Release residual pressure in fuel line
Release Residual Pressure
in Fuel Line
Whenever the high pressure fuel fuse, fuel pipe, delivery pipe, or in ...
 Fuel Pump Repair procedures
Inspection
1.
Turn ignition switch OFF and disconnect the negative (-) battery cable.
2.
Remove the fuel pump assembly.
...
Other information:
Kia Sportage QL (2015-2026) Service Manual: Variable Intake Solenoid (VIS) Valve Repair procedures
Inspection 1. Turn the ignition switch OFF. 2. Disconnect the VIS valve connector. 3. Measure resistance between VIS valve terminals 1 and 2. Specification: 30.0 - 35.0 Ōä” [20┬ ...
Kia Sportage QL (2015-2026) Service Manual: PTG Spindle Repair procedures
Removal 1. Disconnect the negative (-) battery terminal. 2. Remove the rear pillar trim. (Refer to Body - "Rear Pillar Trim") 3. Disconnect the PTG spindle connector (A). ...
Copyright ┬® www.ksportagegl.com 2015-2026
