Kia Sportage: ESP(Electronic Stability Program) System / Front Wheel Speed Sensor Repair procedures
Kia Sportage QL (2015-2026) Service Manual / Brake System / ESP(Electronic Stability Program) System / Front Wheel Speed Sensor Repair procedures
| Removal |
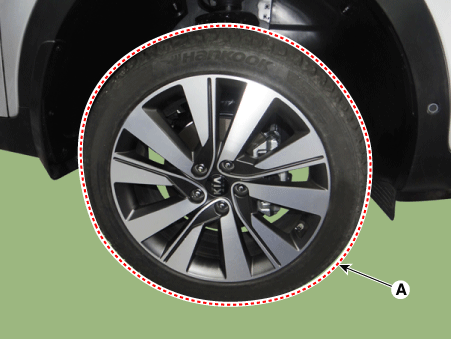
| 1. |
Remove the front wheel and tire (A) from front hub .
|

| 2. |
Remove the wheel speed sensor(B) from the front alxe assembly(A),
|
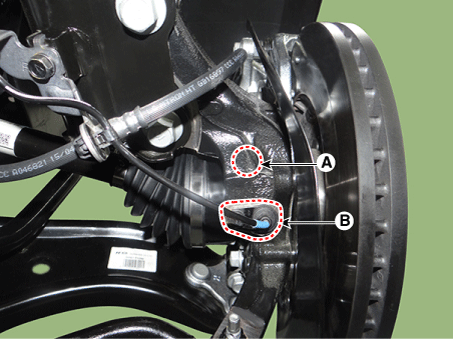
| 3. |
Remove the wheel speed sensor bracket.
|
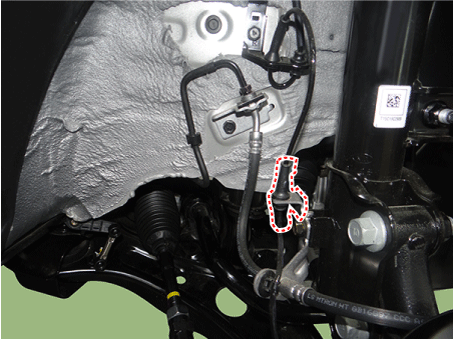
| 4. |
Remove the wheel speed sensor cable braket bolt.
|
| 5. |
Remove the front wheel guard.
|
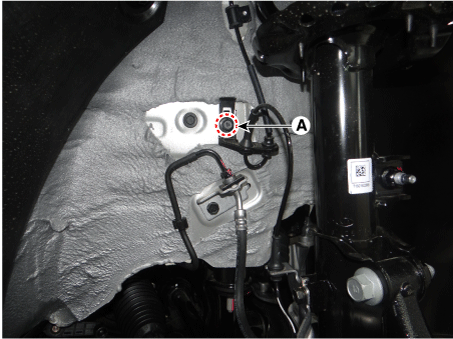
| 6. |
Disconnect the front wheel speed sensor connector and then remove the
front wheel speed sensor.
|
| 7. |
Installation is the reverse of removal.
|
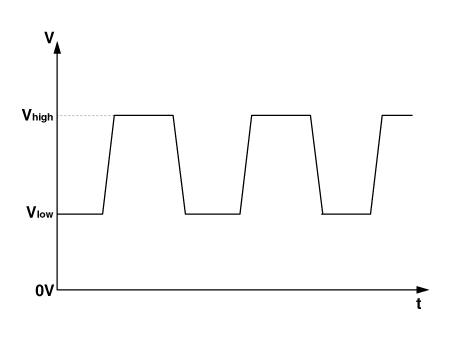
| Inspection |
| 1. |
Measure the output voltage between the terminal of the wheel speed sensor
and the body ground.
|
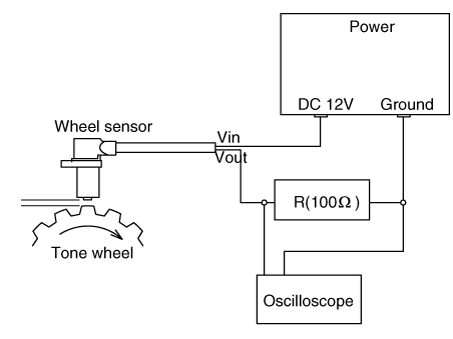
| 2. |
Compare the change of the output voltage of the wheel speed sensor to
the normal change of the output voltage as shown below.
|
 Front Wheel Speed Sensor Components and components location
Components
1. Front wheel speed sensor cable
2. Front wheel speed sensor
...
 Rear Wheel Speed Sensor Components and components location
Components
[2WD]
1. Front wheel speed sensor cable
2. Front wheel speed sensor connector
[4WD]
1. Fron ...
Other information:
Kia Sportage QL (2015-2026) Owners Manual: Tire pressure
Always observe the following: Check tire pressure when the tires are cold. (After the vehicle has been parked for at least three hours or hasn't been driven more than one mile (1.6 km) since startup.) Check the pressure of your spare tire each time you check the pressure of other ...
Kia Sportage QL (2015-2026) Service Manual: Repair procedures
Inspection AEB function ON / OFF switch was included to USM (User Setting Menu) and the state of the factory is ON. When the IGN On, maintain ON condition by default. And does not reflect the driver settings when next IGN On. If turned the ESC function Off, the AEB fu ...
Copyright © www.ksportagegl.com 2015-2026
