Kia Sportage: Crash Pad / Center Fascia Panel Repair procedures
Kia Sportage QL (2015-2026) Service Manual / Body (Interior and Exterior) / Crash Pad / Center Fascia Panel Repair procedures
| Replacement |
Put on gloves to protect your hands.
|
|
[Center fascia lower panel]
| 1. |
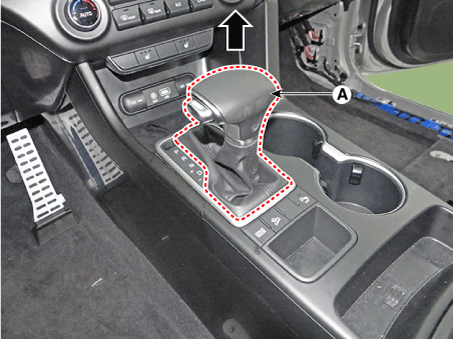
To remove the gear knob & gear boots (A) pull both of it up.
|
| 2. |
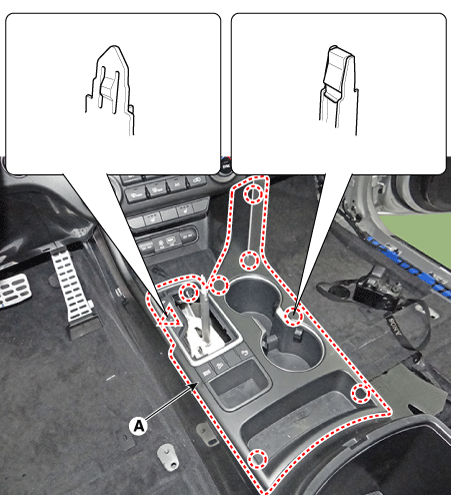
Using a remover, remove the floor console upper cover (A).
|
| 3. |
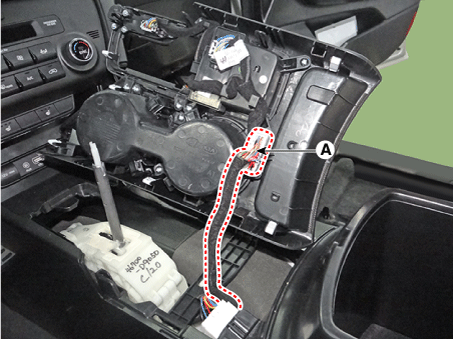
Disconnect the connectors (A) from the floor console upper cover.
|
| 4. |
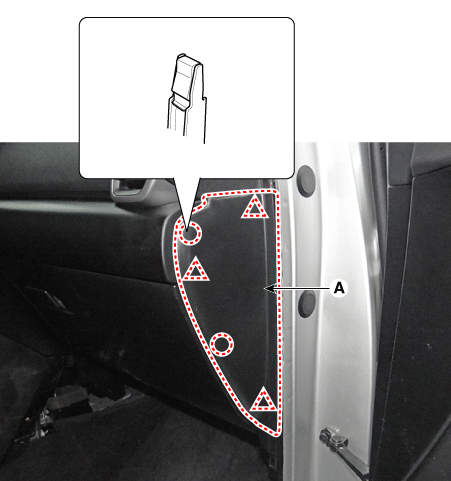
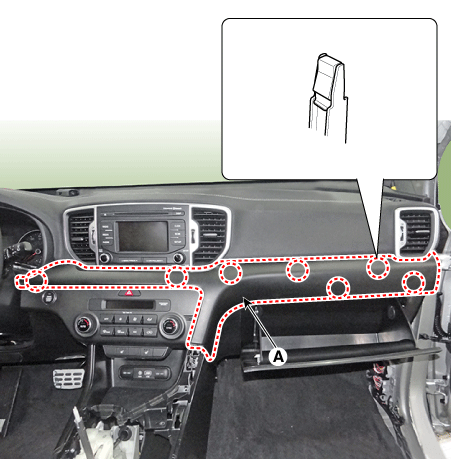
Using a remover, remove the crash pad side cover [RH] (A).
|
| 5. |
Using a remover, remove the crashi pad garnish [RH] (A).
|
| 6. |
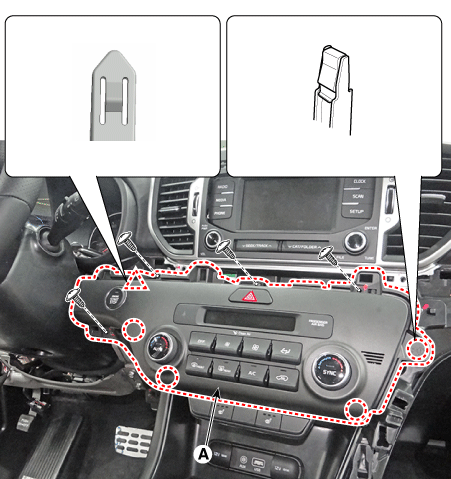
Separate the center fascia panel (A) after loosening the screw.
|
| 7. |
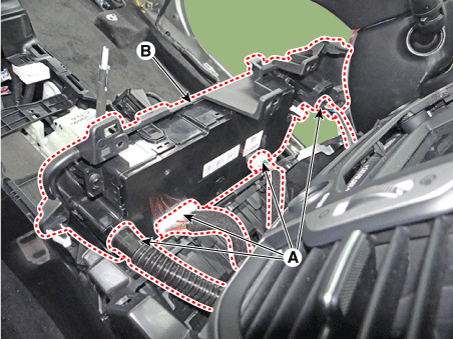
Disconnect the connectors (A) and then remove the heater unit (B).
|
| 8. |
Install in the reverse order of removal.
|
[Center fascia upper panel]
| 1. |
Remove the center fascia lower panel.
|
| 2. |
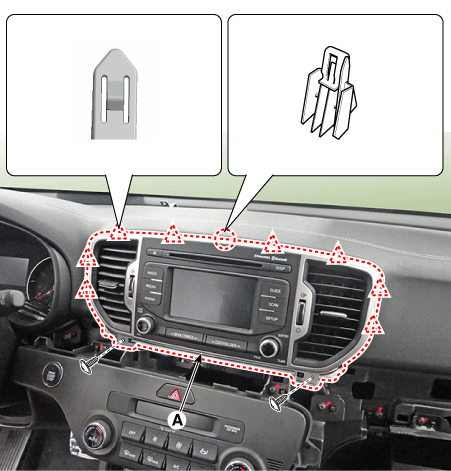
Remove the center fascia upper panel after loosening the screws.
|
| 3. |
Install in the reverse order of removal.
|
 Center Fascia Panel Components and components location
Component Location
1. Center fascia upper panel
assembly
2. Center fascia lower panel
assembly
...
 Crash Pad Garnish [RH] Components and components location
Component Location
1. Crash Pad Garnish assembly
[RH]
...
Other information:
Kia Sportage QL (2015-2026) Service Manual: Purge Control Solenoid Valve (PCSV) Specifications
Specification Item Specification Coil Resistance (Ω) 22.0 - 26.0 [20°C(68°F)] ...
Kia Sportage QL (2015-2026) Service Manual: Input Speed Sensor Description and operation
Description • Input speed sensor uses an electric current type hall sensor in which the current is changed by the magnetic variation. • Input speed sensor and output speed sensor are integrated and installed in the transax ...
Copyright © www.ksportagegl.com 2015-2026


