Kia Sportage: Wireless Power Charger System / Wireless Charging Lamp Repair procedures
Kia Sportage QL (2015-2026) Service Manual / Body Electrical System / Wireless Power Charger System / Wireless Charging Lamp Repair procedures
| Removal |
|
|
| 1. |
Disconnect the negative (-) battery terminal.
|
| 2. |
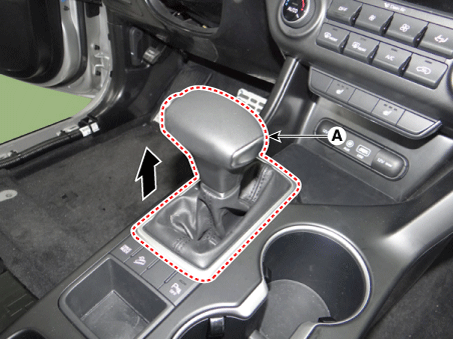
Remove the gear knob & boots (A) pull both of it up.
|
| 3. |
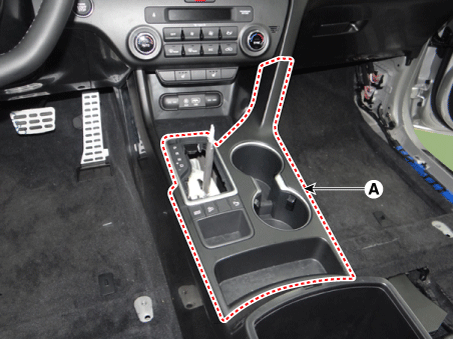
Remove the console upper cover (A) by using a remover.
|
| 4. |
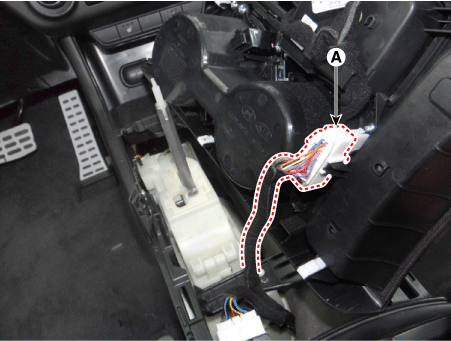
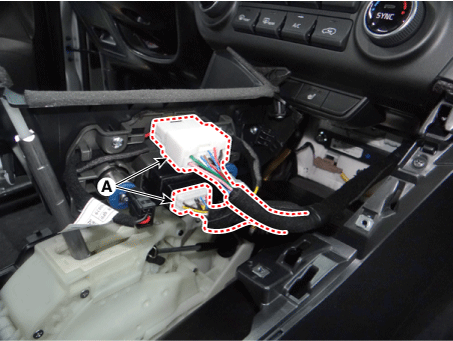
Disconnect the console upper cover connectors (A).
|
| 5. |
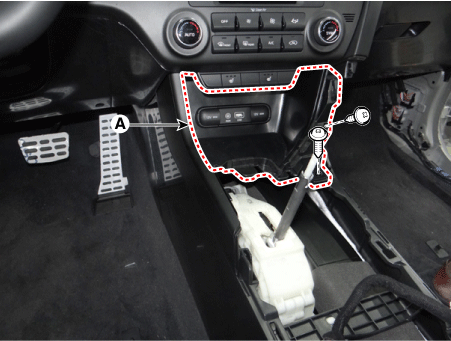
Remove the console front tray (A) after loosening the mounting screws.
|
| 6. |
Disconnect the console front tray connectors (A).
|
| 7. |
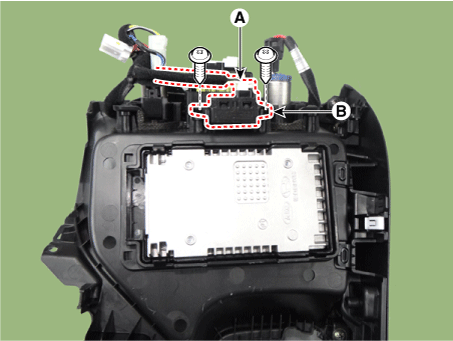
Disconnect the wireless charging lamp connector (A).
|
| 8. |
Remove the wireless charging lamp (B) after loosening the mounting screws.
|
| Installation |
| 1. |
Install the wireless charging lamp.
|
| 2. |
Connect the wireless charging lamp connector.
|
| 3. |
Connect the console front tray connectors.
|
| 4. |
Install the console front tray.
|
| 5. |
Connect the console upper cover connectors.
|
| 6. |
Install the console upper cover.
|
| 7. |
Install the gear knob & boots.
|
| 8. |
Connect the negative (-) battery terminal.
|
 Wireless Charging Lamp Components and positions
Components
...
Other information:
Kia Sportage QL (2015-2026) Service Manual: Rear Seat Back Cover Repair procedures
Replacement [LH] Put on gloves to protect your hands. • Use a plastic panel removal tool to rem ...
Kia Sportage QL (2015-2026) Service Manual: Description and operation
Description Operation procedure (Perpendicular/parallel parking) 1. Select the parking mode by operating sub system switch (A) in the parking direction while checking the message on the instrument panel. Voice guidance: Select the parking mode. Pay ...
Copyright © www.ksportagegl.com 2015-2026


