Kia Sportage: Intake And Exhaust System / Muffler Repair procedures
Kia Sportage QL (2015-2026) Service Manual / Engine Mechanical System / Intake And Exhaust System / Muffler Repair procedures
| Removal and Installation |
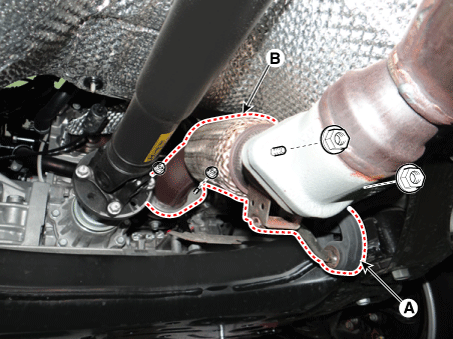
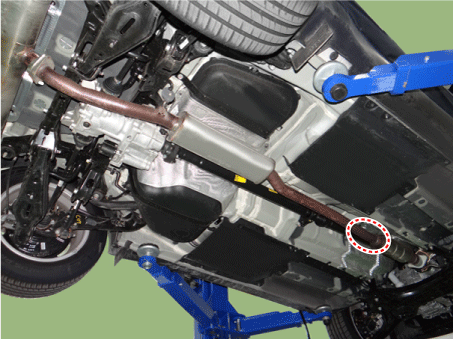
Front Muffler
| 1. |
Remove the engine room under cover.
(Refer to Engine and Transaxle Assembly - "Engine Room Under Cover")
|
| 2. |
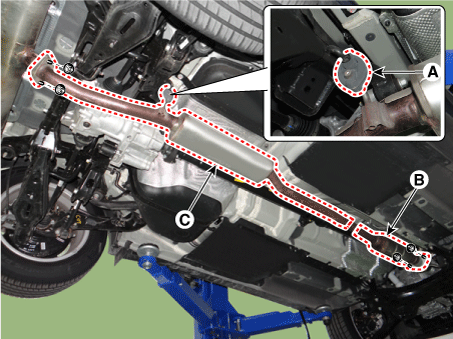
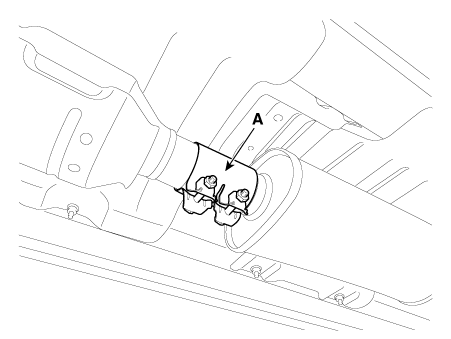
Detach the rubber hanger (A) from the front muffler.
|
| 3. |
Remove the front muffler (B).
|

| 4. |
Install in the reverse order of removal.
|
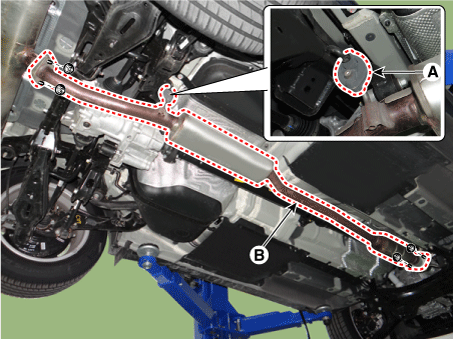
Center Muffler
| 1. |
Detach the rubber hanger (A) from the center muffler.
|
| 2. |
Remove the catalytic converter and the center muffler (B).
|
| 3. |
Install in the reverse order of removal.
|
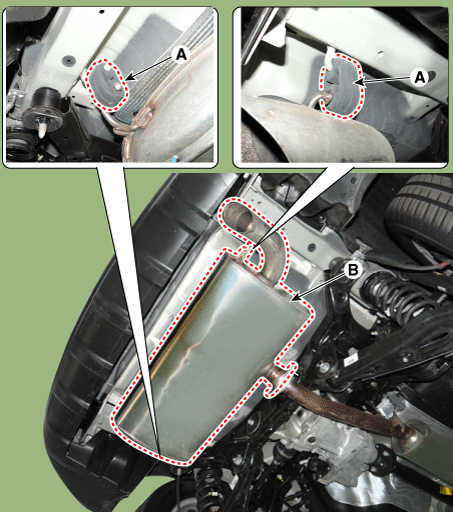
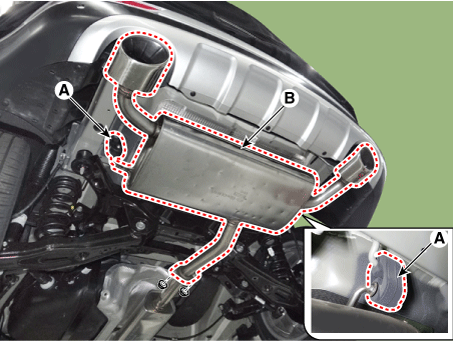
Rear Muffler
| 1. |
Detach the rubber hangers (A) from the main muffler.
|
| 2. |
Remove the main muffler (B).
[Single tail type]
[Dual tail type]
|
| 3. |
Install in the reverse order of removal.
|
Replacement procedure of center muffler using clamp
Under warranty : Replace the center muffler assembly.
Out of warranty : It is available to replace the center muffler as the procedure
below.
| 1. |
Check that the clamping part of the center muffler assembly is damaged
or deformed.
If the muffler is too corroded to clamp, replace the center muffler
assembly.
|
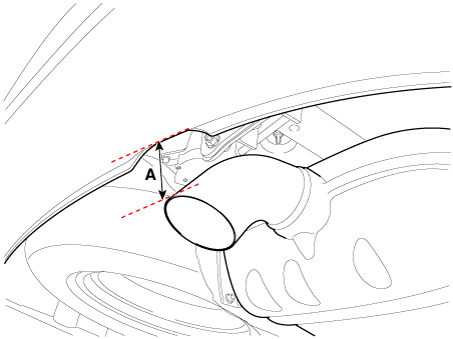
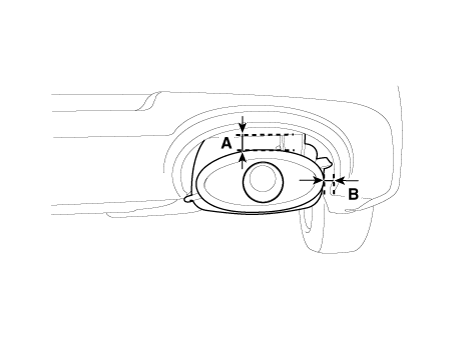
| 2. |
Record the gap (A,B) between the tail pipe (or tail trim) and the rear
bumper.
[Pipe type]
[Trim type]
|
| 3. |
Detach the rubber hanger (A) from the center muffler.
|
| 4. |
Remove the catalytic converter & center muffler (B).
|
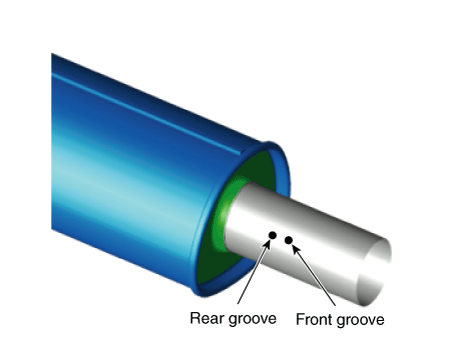
| 5. |
Cut the center muffler as the instruction below.
- Cut the front groove of the muffler.
[Replacement muffler]
-Cut the rear groove of the replacement muffler.
|


| 6. |
Install the center muffler.
|
 Muffler Components and components location
Components
1. Front
muffler
2. Catalytic converter & Center muffler assembly
3. Rear muffler [Single tail type]
4. Rear
muffler [Dual tail type ...

Other information:
Kia Sportage QL (2015-2026) Service Manual: Water Temperature Control Assembly Repair procedures
Removal and Installation 1. Remove the engine cover. (Refer to Engine and Transaxle Assembly - "Engine Room Under Cover") 2. Drain the engine coolant so its level is below water temperature control assembly. ...
Kia Sportage QL (2015-2026) Service Manual: Water pump Components and components location
Components 1. Water inlet pipe 2. Water inlet pipe O-ring 3. Water pump housing 4. Water pump housing gasket 5. Water pump gasket 6. Water pump 7. Water pump pulley ...
Copyright © www.ksportagegl.com 2015-2026
