Kia Sportage: Coupling Assembly / Direct Electro Hydraulic Actuator Coupling Repair procedures
Kia Sportage QL (2015-2026) Service Manual / 4 Wheel Drive (4WD) System / Coupling Assembly / Direct Electro Hydraulic Actuator Coupling Repair procedures
| Inspection |
All units are filled up with coupling fluid (ultra-low viscosity ATF)
prior to shipping. Inspection, fill-up, and replacement of coupling
fluid is therefore not necessary (zero maintenance, lifetime fluid).
|

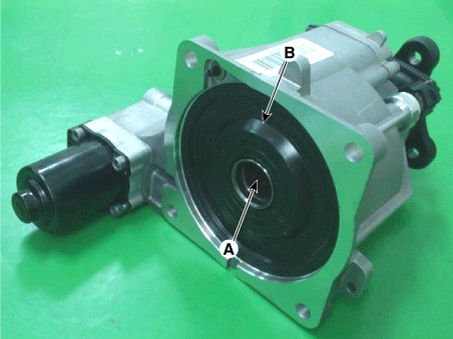
| Removal |
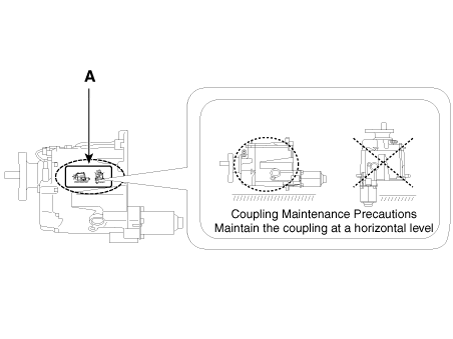
Coupling Maintenance Precautions
Maintain the coupling at a horizontal level.
Refer to the handling caution level (A) when servicing the coupling
(removal, installation, replacement, etc.).
|

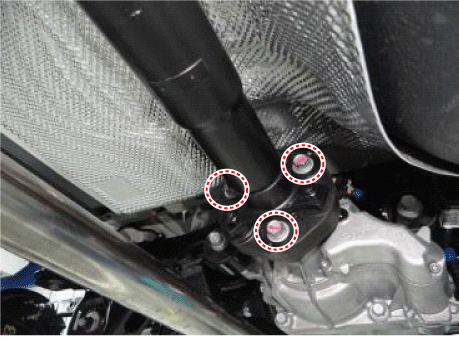
| 1. |
Remove the 4WD coupling assembly bolts (A) mounted to the rear propeller
shaft.
|
| 2. |
Using a flat tool, separate the propellar shaft from 4WD coupling assembly.
|
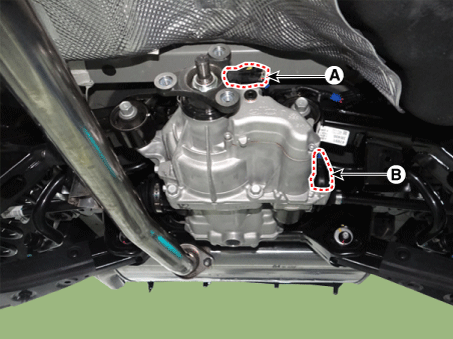
| 3. |
Disconnect the pressure sensor connector (A) and Oil hydraulic Motor
connector (B).
|
| 4. |
Loosen the coupling assembly mounting bolts (A).
|
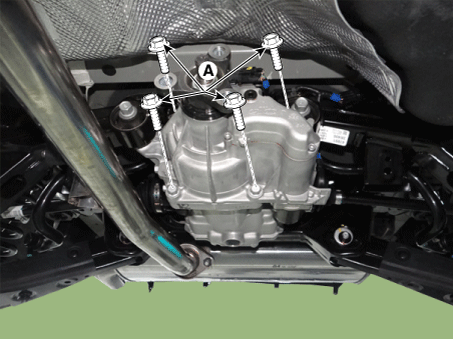
| 5. |
Using a flat tool, separate the 4WD coupling assembly from the rear
differential carrier assembly.
|
| Installation |
| 1. |
Install in the reverse order of removal.
|
| 2. |
After replacing the coupling, reset the 4WD ECU's clutch learning using
the GDS tool.
(Refer to 4WD Control System - "Adjustment")
|
 Direct Electro Hydraulic Actuator Coupling Description and operation
Description
4WD ECU processes signals from various sensors and determines the current road
and driving conditions. The ECU then utilizes this information to implement
precision ...
 Oil hydraulic Motor(Actuator) Description and operation
Description
The 4WD ECM controls the Pump Motor Pump (Actuator) to generating an oil pressure.
The pressure engages a multiple disk clutch to transfer torque to the rear wheels. ...
Other information:
Kia Sportage QL (2015-2026) Service Manual: Water Temperature Control Assembly Repair procedures
Removal and Installation 1. Remove the engine cover. (Refer to Engine and Transaxle Assembly - "Engine Room Under Cover") 2. Drain the engine coolant so its level is below water temperature control assembly. ...
Kia Sportage QL (2015-2026) Service Manual: Repair procedures
Inspection Inspection Item • Battery efficiency inspection • Battery voltage inspection • Charging voltage insptection • General inspection ...
Copyright © www.ksportagegl.com 2015-2026
